Search This Blog

Showing posts with label Nuts. Show all posts

Friday, 18 July 2014

Three Bean and Asparagus Salad

Sorry about the slightly iffy picture of this Three Bean and Asparagus salad; I made it last weekend when DS, DDIL and Gorgeous Granddaughter came round for lunch; everything else was already on the table so I didn’t have time to faff about. I was originally planning to do a cold lunch because I was expecting it to be warm and sunny – proper summer weather; needless to say it was cool and showery…grrr!

Anyway, we had the salad along with a Nut Roast Wellington and some of our crop of new potatoes from the garden cooked with olive oil and rosemary. Our potatoes have done really well this year – I think they enjoyed all the rain we had in May and June, unlike my tomatoes, poor things, which are looking as sick as a pig. Heigh-ho…you can’t have everything.

We’re having a heatwave for the next few days, apparently; it's about 4pm and I’m sitting here in the gloom with the shutters and windows closed to keep the heat out. It’s 29°C – ghastly! I might have to put my thinking cap on and come up with a few more salads to keep us cool.

150g fine green beans
125g fine asparagus
125g edamame beans
150g baby broad beans
100g feta
40g hazelnuts

1 tsp Dijon mustard
1 tsp runny honey
1 tbsp sherry vinegar
2 tbsp walnut oil
1 tsp lemon juice
ground black pepper

Roast the hazelnuts in the oven at 200C for five minutes then set aside to cool.

Put all the dressing ingredients into a small jam jar and shake like billy-o until emulsified.

Cook the green beans and asparagus together in boiling water for 1 minute; drain and run under cold water then drain well.

Cook the edamame beans and broad beans together for three minutes; drain and refresh in cold water then drain well.

Arrange the green beans and asparagus on a shallow serving dish followed by the edamame and broad beans.

Crumble the feta over the top and sprinkle with the chopped hazelnuts.

Drizzle over the dressing and serve immediately.

Serves 4 as a side dish.

Wednesday, 8 May 2013

Leek, Goat's Cheese and Walnut Tart

I think we’ve finally seen the last of the really cold weather, although even last week we were having overnight frosts! The Bank Holiday weekend was lovely though and we really took advantage of the weather; the raised beds in the garden are finally planted up with potatoes, sugar-snap peas, French beans, carrots, beetroots, courgettes, red and white onions and plenty of herbs; the tomato plants are sitting snugly in their propagator in the shed waiting to be put out when they’re a bit bigger.

I’ve already picked loads of rhubarb but we haven’t had a single blossom on the plum or greengage trees, however the damson has had plenty and the apple tree is absolutely covered in the most beautiful pink and white blossom as I write, so hopefully we’ll have a better crop on those than last year.

It’s been so nice to have a few days of eating more summery food again; I was beginning to think I’d be cooking soup, curries and chilli sans carne forever! My sister and BIL came to us for lunch on Sunday. My first thought was a tagine but then the weather warmed up a bit so I ditched that idea and went for something a little more spring-like – a lemony leek and goat's cheese tart served with rosemary-roast new potatoes and a warm spring salad.

A couple of things I changed in the recipe for the tart: I doubled the amount of leeks because I love them and I halved the amount of cheese. People always tend to overdo the cheese in vegetarian recipes – I think they’re afraid we’ll go short of protein!

Thursday, 22 November 2012

Porcini and Chestnut Roast

There seems to be 1001 Christmas magazines around at the moment – every one of them promising the “Best Ever Christmas”...! They can't all be right, surely? The only one I’ve bought this year is the BBC Good Food Vegetarian Christmas; it’s OK but there’s nothing in there that makes me go “Wow – I must make that!”

I always pick up any free food magazines when I’m in a supermarket, though, just in case there’s something in there worth trying. There rarely is, actually, so I was pleasantly surprised when I saw a recipe for a Christmas stuffing in a Waitrose mag which looked like it had possibilities. It was listed as a stuffing but I thought it would convert, with a few tweaks and additions, into a tasty nut roast; so I changed some of the ingredient proportions, then added more mushrooms and a smidge of lemon to sharpen it up a bit and this is the result.

We had some for dinner last night with jacket potatoes and a tomato salad and I have to say it was really rather good; not the sort of thing I usually do for a midweek meal but it made a nice change and will definitely go on my list of 'keepers'. It'd be good for a Sunday lunch if served with all the usual suspects and, although I’m planning on serving Nut Roast Wellington for Christmas Day, I think it’s worth keeping this up my sleeve as an alternative.

1 medium onion, finely chopped
150g chestnut mushrooms, chopped
2 cloves garlic, crushed
1tbsp olive oil
40g dried porcini
250g ciabatta breadcrumbs
300g vac-packed chestnuts
75g grated parmesan-style cheese
handful of chopped parsley
1 egg
1 tsp Marigold Stock powder
grated zest and juice of half a lemon

Put the ciabatta breadcrumbs in a large mixing bowl. Soak the porcini in 250mls of boiling water for 10 minutes then strain, reserving the soaking liquid; chop finely and add to the breadcrumbs.

Sauté the onion and mushrooms in the olive oil for 5 minutes; add the garlic and cook for another couple of minutes then add the veg to the mixing bowl.

Roughly chop the chestnuts, leaving some of the pieces quite chunky, and add to the bowl along with the cheese and parsley.

Mix the reserved porcini liquid with the beaten egg, stock powder, lemon zest and juice; pour over the breadcrumb mixture and stir really well. Spoon into a lined 2lb loaf tin and bake at 180C for 50-60 minutes.

Allow to cool for 15 minutes before cutting into thick slices to serve.

Monday, 21 May 2012

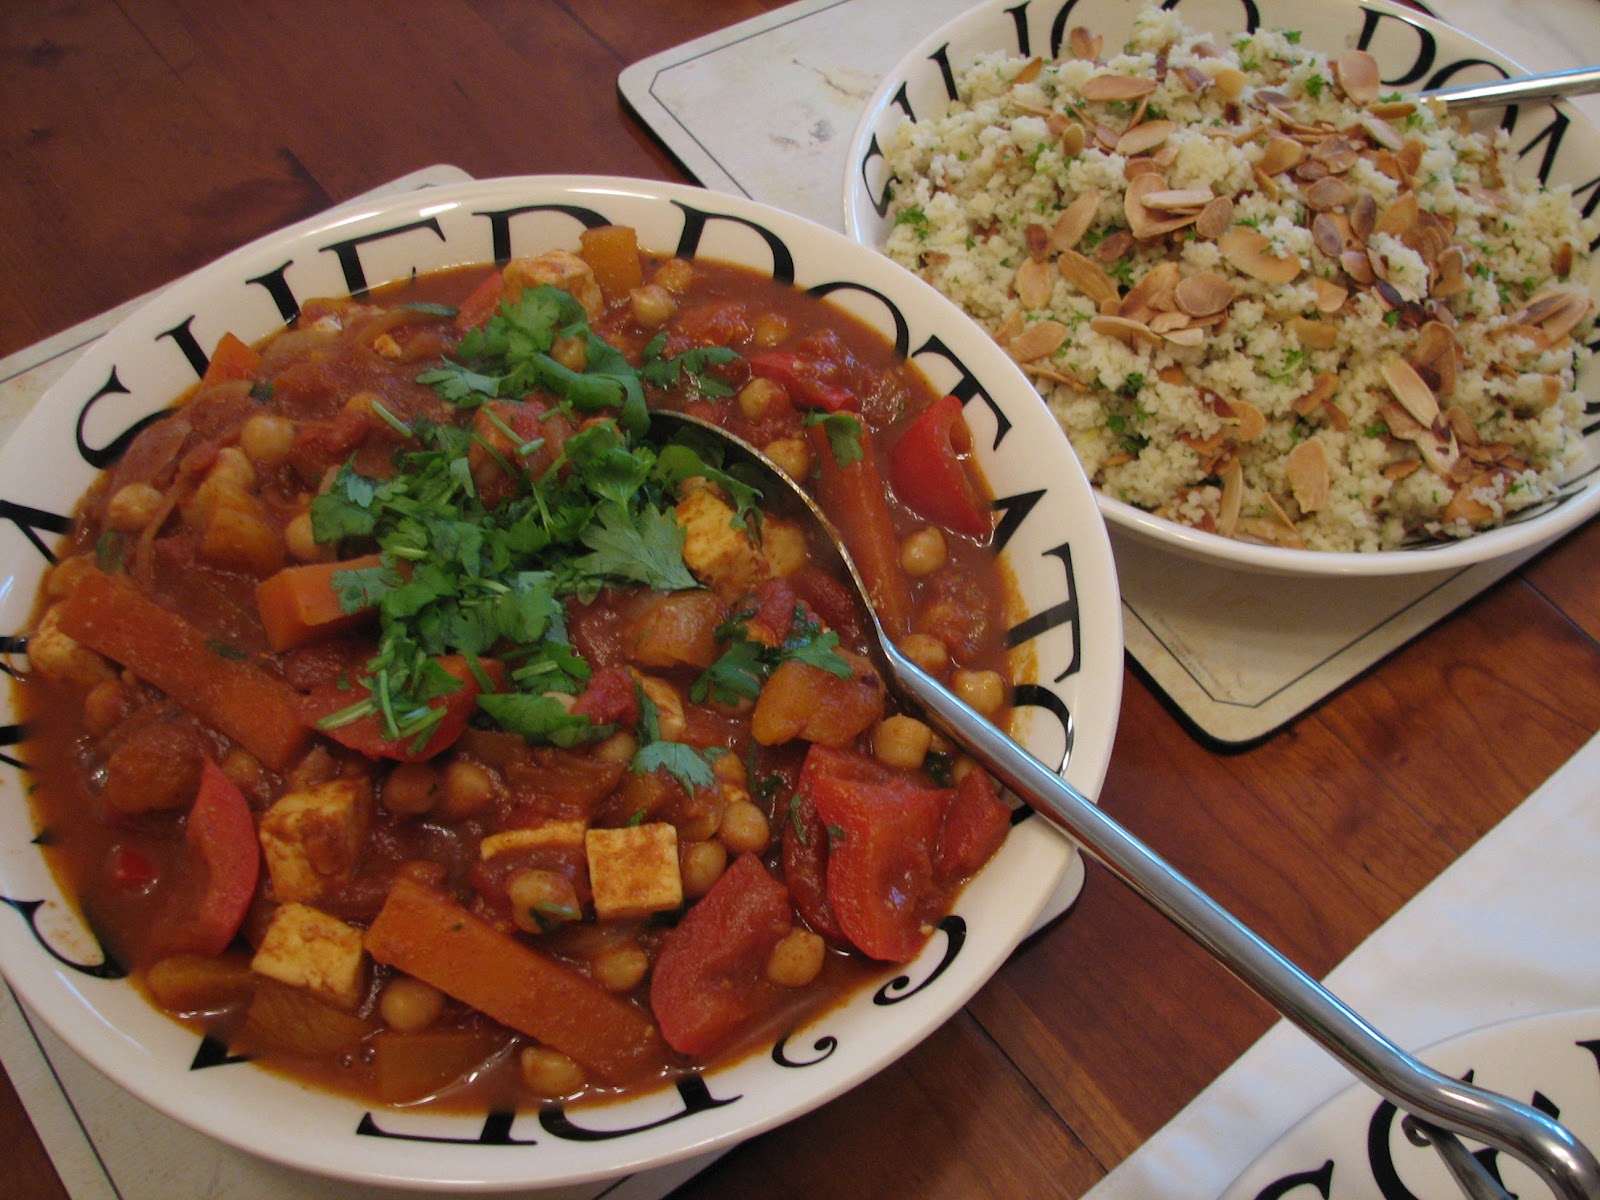
Fruity Tagine with Lemon and Almond Couscous

The weather here has been awful for the last few days, constantly grey and cold, nothing like May should be at all. In a spirit of optimism we planted a whole lot of vegetable seeds last week but it’s been so chilly I’m not entirely convinced they’ll survive. However, there are reports of things warming up a bit later in the week; hmm…I’ll believe it when I see it!

So…what to eat? It’s too cold for light summery meals but I feel heavier winter meals should be over by now. I just didn’t know what to do for dinner last night; it was a case of opening the fridge to see what inspired me.

I finished up making this tagine; I’ve followed tagine recipes in the past that I’ve not been too impressed with, they just didn’t seem to do it for me, so this time I made it up as I went along, adding more of this and less of that to suit our taste. I make no claims as to its authenticity (I know you don’t usually find paneer in a tagine!) but we enjoyed it and I’ll definitely make it again.


2 tbsp olive oil
1 large red onion, peeled and sliced
2 cloves garlic, crushed
2 tsp each of cumin, paprika and cinnamon
½ tsp chilli flakes
1 large carrot, peeled and cut into batons
1 red pepper, cut into chunks
1 tin chopped tomatoes
400ml stock
1 tbsp honey
250g paneer, cubed
1 tin chickpeas, drained
100g dried apricots, halved
handful of chopped coriander

200g couscous
275ml boiling stock
zest and juice of 1 lemon
50g toasted flaked almonds
handful of chopped parsley

Heat the oil in a large pan and fry the onion over a medium heat for five minutes; add the garlic and the spices and cook for a further minute or two.

Add everything else, except the chopped coriander, stir well and bring to the boil; pop a lid on and turn the heat down. Leave to simmer gently for 45 minutes.

About 10 minutes before the tagine is ready put the couscous, zest and juice of the lemon in a large bowl; add the boiling stock, stir once, cover the bowl with a plate and leave for 8-10 minutes. When all the stock has been absorbed, fluff up the couscous with a fork and stir in the toasted almonds and the chopped parsley.

Stir ¾ of the coriander into the tagine before serving and sprinkle the rest of it on top.

Serves 4

Sunday, 6 May 2012

Pesto Pasta Salad

Helloooo….I’m back!

Do you ever see something in a supermarket and think “I could make that”? Well, that’s what I did with this pasta salad. I love those little tubs of different salads that you find in the supermarket chiller cabinets but, let’s be honest, they’re a complete rip-off so I thought I’d have a whirl at making a similar one myself. In fact, I might just work my way through the entire range at Waitrose – making my version of my favourites.

I’m not sure we’ll be having a summer this year (we don’t even seem to have had spring yet or maybe I blinked and missed it – this is definitely the wettest drought I’ve ever seen!) but if we ever get a break from the rain this salad is just the sort of thing I’d be happy to have for lunch with a few tomatoes and maybe some rocket, whilst sitting in the garden watching the grass grow.

125g pasta shapes (I used trofie)
125g fine green beans
1tbsp olive oil
2 tbsp pesto
30g pine nuts

Cook the pasta in a large pan of boiling water until al dente; top and tail the beans and cut into thirds, throw them in with the pasta for the last 3-4 minutes of the cooking time. Drain the pasta and beans and rinse well under cold running water to stop the cooking process; drain well then stir in the olive oil followed by the pesto.

Toast the pine nuts in a dry frying pan (watch them like a hawk – they burn if you so much as blink!) and sprinkle over the salad before serving.

I prefer this at room temperature rather than fridge cold, the flavour of the pesto really comes through. 

Wednesday, 18 January 2012

Spiced Cauliflower and Almond Soup

I’ve rarely met a soup I didn’t like and I liked the look of this one as soon as I saw it! It was the perfect lunch for a damp chilly January day with a chunk of fresh seedy bread followed by yogurt and fruit.

Needless to say I didn’t follow the recipe to the letter (I never do!) but I always think the odd tweak here and there is a good thing. I added a large chopped onion and two crushed cloves of garlic to the pan before adding the cauliflower; I also needed to add quite a bit more stock than the recipe stated, probably about another 500ml, it would have been the consistency of cake-mix otherwise!

Mr Simply Veg has been struggling with a cold for the past week or more; he said this warmed him up nicely and the harissa helped clear his head. So there you are - food and medicine all-in-one, what more could you ask for? 


Sunday, 1 January 2012

Lentil and Chestnut Soup

I can’t believe it’s the 1st of January today and the start of another New Year; I’m still wondering where 2011 went, I seem to have blinked and missed it!

There are lots of superstitions centred on the first day of the year and, although I don’t usually have much time for that sort of mumbo-jumbo, I was taken by the fact that many of these beliefs focus on prosperity. I don’t know about you, but I think anything that might bring me a bit closer to winning the Lottery sounds like a very good thing, so I thought I’d join in, just in case!

Apparently lentils, as well as peas and beans, are symbolic of money, so I scouted around for a nice lentil soup recipe and came across one from Nigella. I’ve changed it a bit to accommodate the ingredients that I had to hand but it still tastes brilliant and it also made a goodly amount which will give at least six portions. It had the added benefit of using up half a bag of chestnuts lurking in the freezer.

Now then, I’ve had my bowl of lentil soup, when does all that good luck and prosperity start coming my way…?

1 tablespoon olive oil
1 medium carrot, chopped
1 medium onion, chopped
2 sticks celery, chopped
2 cloves garlic, crushed
200g red lentils
200g frozen chestnuts
1.5 litre stock
crème fraîche and chopped parsley, to serve

Heat the olive oil in a large saucepan and sauté the onion, carrot and celery for five minutes, add the garlic and cook for another minute then add the lentils, chestnuts and stock. Bring to the boil then turn the heat down to the merest simmer, put the lid on and leave it to murmur away for half an hour.

Take off the heat and blitz with a stick blender.

Top with a spoonful of crème fraîche and chopped parsley to serve.

Monday, 19 December 2011

Decorated Christmas Cake

Here we are…the finished article! As you can see, I decorated my Christmas cake at the weekend and, though I say it myself, I think it looks pretty good.


I’m not very good at Royal icing; in fact, I don't think I've flat iced a cake in my life. (I can do you a rough snow-scene with the obligatory plastic robin to complete the effect, though!) I don’t much like ready-to-roll fondant type icing, it always reminds me of children’s playdoh in both appearance and taste, so I went for a layer of marzipan with a topping of nuts and apricots with an apricot and brandy glaze; easy but effective.

1 18cm square rich fruit cake
white marzipan
a little icing sugar
3 tbsp apricot jam
1 tbsp brandy
soft dried apricots
whole brazils
whole pecans or walnuts
ribbon

Make the glaze by heating the jam and brandy gently in a small pan until the jam melts, then rub the mixture through a sieve with the back of a spoon. Using a pastry brush, paint the top of your cake generously with the glaze; roll out the marzipan to a depth of about 0.5cm on a surface lightly dusted with icing sugar and cut to size using the base of your cake tin as a guide. Lay the marzipan on top of the cake and brush with more glaze.

Arrange the fruit and nuts on the marzipan, pressing them in lightly (I’m sure you’ll be more artistic than me!) and brush again with the apricot glaze.

Tie a ribbon around the outside of the cake, stand back and feel dead chuffed with yourself!

Store in an airtight tin until needed.

Sunday, 20 November 2011

Christmas Cake II

It’s ‘Stir-up Sunday’ today, the day when people traditionally make their Christmas puddings; we’re not having the usual sort of pud so, instead, I made my Christmas cake.


(I've just noticed that the whole hazelnuts look like little pebbles on the surface of the cake; too bad, no-one will see them when the marzipan is in place!)

Last year I made Nigel Slater’s small fruit cake; it was really nice, good texture and lighter than most rich fruit cakes I’ve tasted. However, we both agreed that a larger cake was needed to last the two of us through December, so I have to confess I’ve fiddled with the recipe a bit and I’ve also scaled it up somewhat to make an 18cm square cake.

I don’t really have a sweet tooth, but I do like a piece of cake with a cuppa of a winter’s afternoon. If I can combine it with a bit of present wrapping and maybe a Christmas song or two on the radio, so much the better!

675g mixed dried fruit (along with the usual vine fruits I included some dried cranberries, chopped preserved ginger and chopped dried apricots)
3 tbsp brandy
2 tbsp Cointreau
grated zest and juice of an orange
190g unsalted butter
100g light muscovado sugar
90g dark muscovado sugar
3 large eggs
100g whole hazelnuts
60g ground almonds
190g plain flour
1 level tsp baking powder
½ tsp ground cinnamon
½ tsp ground nutmeg
brandy for feeding the cake

an 18cm square cake tin or a 20 cm round tin if you prefer
 

Put the dried fruit into a bowl, pour over the brandy and Cointreau, then add the zest and juice of the orange. Stir the fruit well to coat it in the alcohol, cover, and set aside overnight.

Next day, line the cake tin with a double layer of non-stick baking parchment allowing the paper to come 5cm above the rim of the tin.

Turn the oven on to 160C.

Beat the butter and sugars with an electric hand mixer until light and fluffy. Whisk the eggs in a small bowl and add them, a little at a time, to the creamed butter and sugar, beating well after each addition. Add the dried fruit, ground almonds and whole hazelnuts, stirring them in well with a large spoon (don’t use the mixer now, it’ll break up the fruit).

Sift the flour with the baking powder and spices then stir it into the cake mixture, a heaped tablespoon at a time.

Spoon the mixture into the lined cake tin then bake for exactly one hour without opening the door. Turn the temperature down to 150C, quickly place a double sheet of baking paper over the top of the cake and continue cooking for a further 1½ hours.

Test by inserting a skewer into the centre of the cake, it should slide out cleanly, if it looks a bit damp or sticky give it another ten minutes in the oven and test again with a clean skewer.

Let it cool in its tin and, when it’s cold, wrap the cake and its paper in another layer of baking paper and store in an airtight tin in a cool place. Feed it with a little brandy every week till you’re ready to decorate it.

I think I'll do the same as I did last year: no icing, just a layer of marzipan topped with nuts and dried fruits with an apricot and brandy glaze.

Saturday, 19 November 2011

Nut Roast Wellington

I’m planning to do this rather spiffing Nut Roast Wellington as the centrepiece of our Christmas lunch this year. Having never made one before the last thing I wanted was to put the whole thing together on Christmas morning only to find it didn’t work…! Nightmare! So, a couple of weeks ago, before I went down with the dreaded lurgy, I decided to have a trial run.

The thing I was most worried about was the pastry splitting, allowing all the filling to fall out, but I needn’t have worried; it all held together nicely and went surprisingly well.

Although the instructions look lengthy, it’s actually not as fiddly to do as I expected; it sounds much worse than it is. Now I’ve done it I feel quite confident about doing it again; in fact, I’m looking forward to it.

I shall be serving this on Christmas Day with roast potatoes, maple roast roots (parsnips, carrots and celeriac), sprouts with chestnuts and proper homemade gravy. Lovely!

Incidentally, if you're looking for something to serve with the leftover Wellington, can I suggest this Root Vegetable Gratin? It tastes brilliant and it cleverly uses up any leftover roasted roots from Christmas Day.


Nut Roast mixture:

1 onion, finely chopped
1 tbsp olive oil
200g whole mixed nuts
175g fresh wholemeal breadcrumbs
75g mature cheddar, grated
200ml stock
1 egg, beaten
½ tsp Marmite
1 tsp dried oregano
25g dried cranberries

Mushroom Duxelles:

250g chestnut mushrooms, very finely chopped
1 shallot, finely chopped
few fresh thyme leaves
25g butter

500g pack of ready-rolled puff pastry
1 egg, beaten


For the Mushroom Duxelles:
Sweat the mushrooms, thyme and chopped shallot in the butter over a very low heat until all the liquid has evaporated and you are left with an almost dry mushroom pate. Set aside to cool.

For the Nut Roast:
Sauté the chopped onion in the olive oil until golden and set aside to cool.
Grind the nuts in a food processor until reasonably fine, but still with some texture. Place the ground nuts in a large bowl; add the breadcrumbs, grated cheddar, oregano and cooled onion; mix well. (At this point you can put it in the fridge and finish it off next day, if you want.) Whisk the stock together with the beaten egg and Marmite; add this to the bowl and mix with a fork until the mixture starts to hold together. Remove about 1/3 of the mixture to a small bowl and stir in the dried cranberries.

Assembling the Wellington:
Unroll the pastry onto a lightly floured surface and roll lightly with a rolling pin to make it a bit larger.

Put the nut roast mixture with cranberries in the centre of the pastry and form into a rough rectangle about 8cm x 12cm. Spread the mushrooms duxelles over the top, then cover with the remaining nut roast mixture.

Now the fun begins! Fold the edges of the pastry over like a parcel, to completely enclose the nut roast, using the beaten egg to seal all the edges. You may need to cut off a bit of the pastry to avoid the seams being too thick. (I cut some little Christmas trees from the trimmings and stuck them on top but, quite frankly, that was a waste of time!)

Line a shallow baking tray with non-stick baking paper and, very carefully, turn the Wellington over and lay it, seam-side down, on the baking tray. Brush all over with the rest of the beaten egg and bake at 210C for 20 minutes then turn the temperature down to 180C and cook for a further 35-40 minutes until deep golden brown and cooked through. (I have a fan oven so you may need to adjust timings or temperatures a bit).


It looked a bit like a rather gorgeous loaf of bread when it came out of the oven! Allow to cool for about 20 minutes before cutting in thick slices to serve.

Serves 4 with lots of lovely leftovers to pick at later! It's also fabulous cold with chutney and salads on Boxing Day.


Quick update:  Last year I decided to go down the route of making a plait. To be honest, it was much easier and quicker than the original version and it was just as yummy.

All I did was lay the ready-rolled puff pastry on a floured baking sheet, put the same filling as above length-ways down the centre third, then cut the pastry either side into an even number of strips slightly on the diagonal; brush the strips with beaten egg then fold over the filling, making sure you tuck the ends in neatly. Brush the whole thing with more beaten egg and bake as above. 


And there you go - you have yourself a gorgeous golden Christmas Nut Roast Plait!

Monday, 29 August 2011

Mincemeat Loaf Cake

I was having a tidy-up in the pantry the other day, trying to make some room for the chutneys that I'll be making over the next few weeks and, given that I shall also be making my Christmas mincemeat soon, I thought I’d better use up the last jar of the 2010 vintage which was lurking on the top shelf. (Good Grief! I just mentioned the ‘C’ word and it’s still only August!!) As a bonus I also found half a bag of pecans that was looking for a good home.

Because I don’t bake very much I don’t have a lot of cake tins and I couldn’t find a single recipe on the net which fitted any of the tins I have. I ended up adjusting a generic ‘Fruit Cake’ recipe, baked it in a loaf tin, and hoped for the best!

It turned out quite well, as it happens. OK, as cakes go, it won’t win any beauty competitions, but I think the flavour of the well-matured mincemeat plus a handful of chopped pecans more than makes up for any deficiencies in the looks department!

125g soft unsalted butter
125g golden caster sugar
3 eggs
225g self-raising flour
½ tsp baking powder
300g mincemeat
50g chopped pecans

1 tsp of granulated sugar

Put the butter, sugar, eggs, flour and baking powder into a large bowl and mix well with an electric mixer. Add the mincemeat and pecans then mix well with a wooden spoon so that you don’t break up the fruit and nuts too much. Turn the mixture into a 2lb loaf tin lined with baking parchment, sprinkle the top with a teaspoonful of sugar and bake at 160C for 1¼ - 1½ hours.

Cool on a wire rack and store in an airtight tin.

Tuesday, 2 August 2011

Beetroot, Feta and Walnut Salad

Beetroot…I think it’s another one of those 'love it or hate it' foods. I've always loved it but until today I’ve only had it pickled from a jar or from a shrink-wrapped packet bought at the supermarket. Well, I am so excited, I’m fit to burst – I have just made a salad with our very first home-grown beetroot plus some gorgeous salty-sharp feta and toasted walnuts! (Really, I must get a life…I should not be this excited about a root vegetable!)

It was absolutely delicious and like no other beetroot I’ve ever tasted; I don’t know whether that’s because it was only dug from the garden this morning, because it was organically grown or because it was freshly cooked…probably a bit of all three but, whatever the reason, I have had a slice today of my own little beetrooty heaven!

4 medium raw beetroot
3 tomatoes, cut into largish chunks
½ a small red onion, thinly sliced
3 or 4 good handfuls washed salad leaves
200g feta, roughly crumbled
50g walnut halves

1 tsp Dijon mustard
1 tsp grainy mustard
1 tsp runny honey
juice of ½ a lemon
few grinds of black pepper
2 tbsp olive oil

Wrap the beetroots individually in foil, place directly onto the oven rack and roast at 200C for 30-40 minutes until tender. While the beetroots are cooking put the walnuts into a small baking tin and toast in the oven for 8 minutes (put the timer on, they turn to charcoal very quickly!)

When the beetroots are cooked and cool enough to handle, slip the skins off and cut into wedges through the root ends.

For the Honey Mustard Dressing - whisk the two mustards, honey, lemon juice and black pepper together in a small bowl then gradually whisk in the olive oil until the dressing thickens.

Chop or tear the salad leaves into bite-sized pieces and divide between two serving plates; top with the chopped tomatoes and red onion followed by the beetroot wedges, feta and the roughly chopped toasted walnut halves.

Drizzle over the dressing just before serving.

Serves 2

Monday, 11 July 2011

Banana Bread

This is a really lovely banana bread which I had nothing whatsoever to do with; my nephew made it and brought it with him when he came for lunch yesterday.

It’s moist, flavourful and spicy; it's also much darker and richer than the banana bread I usually make, from St Delia’s Complete Cookery Course, circa 1984 (!) I’m sure Delia will be gutted to know that she has now been cast aside like an old sock because, having prised the recipe out of him, I shall be using this one in future!


I’m reliably informed (by said nephew whose sister, my niece, now lives in Sydney) that banana bread, lightly toasted and buttered, is a favourite breakfast in Australia. Now, why have I only just found this out? Just think of all those lost years when I could have legitimately been eating cake for breakfast! There has obviously been a serious gap in my education, this is the sort of useful information I should have known… it’s nothing short of a disgrace! 

2 eggs
270g light soft brown sugar
3 over-ripe bananas, mashed
270g plain flour
1 tsp bicarbonate of soda
1 tsp baking powder
1 tsp ground ginger
1½ tsp ground cinnamon
a handful of pecans, roughly chopped (reserve 8 whole ones)
140 g melted butter

Beat the eggs and sugar together until well combined then mix in the bananas; add all the other ingredients, except the butter, and mix well; add the butter and mix to form a very soft batter.

Turn the mixture into a well-greased 2lb loaf tin, lay the whole pecans on top and bake at 180C for about 45-50 minutes until risen and cooked through. Test with a skewer and bake for a further 10 minutes if necessary.

Cool on a wire rack and store in an airtight tin.

Update: 12/7/11

I am happy to report that toasted banana bread with a little unsalted butter and some homemade marmalade is an absolutely scrummy breakfast! Well, I had to try it, didn’t I - it would have been rude not to!

Friday, 27 May 2011

Mushroom and Chestnut Casserole

It’s been funny weather-wise this week, it started off sunny and warm, poured with rain yesterday and today things were very cloudy and chilly; if we'd had snow we could have had all four seasons in one week!

I hadn't intended to make this mushroom and chestnut casserole; it was a bit of a surprise, really. I fancied a curry to warm us up a bit, but I was having a rummage in the freezer (searching for some frozen coconut milk which I never actually found I wonder what happened to it?) when I discovered a pack of frozen chestnuts left over from Christmas; I also had loads of mushrooms in the fridge so, together with a few other store cupboard bits and pieces, I made a rather unexpected dinner.

I love it when something delicious turns up by surprise; we’ll have the curry another day!


1 tbsp olive oil
2 onions, chopped
3 carrots, chopped
2 sticks celery, chopped
2 cloves garlic, crushed
250g mushrooms, halved or chopped if large
6 sun-dried tomatoes in oil, chopped
2 tbsp plain flour
500ml veg stock
100ml red wine
1 dsp tomato puree
1 tbsp soy sauce
1 tsp dried thyme
200g chestnuts (vacuum-packed)

Mix the stock, wine, tomato puree, soy sauce and thyme together in a large jug and set aside. Heat the oil in a large pan and fry the onions, carrots and celery over a medium heat for five minutes; add the mushrooms, garlic and sun-dried tomatoes and fry until the water from the mushrooms evaporates; stir in the flour then add the wine and stock mixture; bring to the boil, stirring, then add the chestnuts; put the lid on, lower the heat and cook over a gentle heat for 30-40 minutes, stirring occasionally.

I served it with tenderstem broccoli and some decent bread to mop up the delicious gravy, but rice or mashed potatoes would also be nice.


Serves 2 with enough left for lunch tomorrow

Sunday, 1 May 2011

Maple Pecan Flapjacks

I know some people make cake every week, for them there's always cake in the tin for visitors; I make cake about 3 or 4 times a year! It’s not that I don’t like it, the problem is I do like it and my weight is quite enough of an issue as it is! I also like the actual ‘making’ of cake; all the measuring and mixing, plus the wonderful smells emanating from the kitchen, is very satisfying.

Mooching about on the net the other day I saw a recipe for Cranberry and White Chocolate flapjacks, which set me thinking about baking. Needless to say I had no white chocolate or cranberries in the pantry so I improvised with what I had to hand; the result was a moist chewy confection that's incredibly moreish.

I won’t try to pretend that these are even remotely 'healthy' or 'good for you' despite their rustic wholesome appearance; yes, I know there are all those oats and nuts, but there is also all that butter and sugar! But who wants 'low-fat' where cake is concerned?! Everyone deserves a treat once in a while; a little of what you fancy does you good in my opinion and anyway, I have a cunning way of getting round the issue of having such tempting morsels in the house – I take them round to my son and daughter-in-law….simples!


200g unsalted butter
150g golden granulated sugar
80g golden syrup
40ml maple syrup**
150g pecan nuts, chopped
350g rolled oats


Melt the butter, sugar and both syrups gently together in a very large saucepan, stirring over a low heat just until the sugar melts. Do NOT allow the mixture to boil or you’ll have a panful of toffee! Take off the heat and stir in the oats and chopped nuts. Mix really well until all the oats are completely amalgamated with the delicious gooey, buttery mixture.

Press the flapjack mix into a 20cm x 30cm x 2cm tin lined with baking parchment and bake at 180C for 25 mins. Mark into squares whilst still warm but don’t remove from the tin until they’re completely cold. Store in an airtight tin.

Makes 15-20 squares.

**Please use pure Maple Syrup for this recipe - I know it's expensive, but you really need the intense flavour. The much cheaper 'Maple flavoured' stuff is ghastly and just won't do.

Monday, 11 April 2011

Coronation Chickpeas

I know it's not quite summer yet, but we'll soon be there. We had lunch in the garden yesterday for the first time this year - nothing special, just some nice bread, cheese, a few tomatoes and some homemade chutney. The garden table and chairs were dusted off, the grass was cut and the allotments across the road were a hive of activity; it was lovely eating outside again after such a cold winter. A few of our plants look a bit sick because of the snow at the end of last year but, with a bit of sun and some TLC, they’ll probably recover.

Before I went veggie one of my favourite warm weather meals was Coronation Chicken; I still make it sometimes for visiting omnivores but obviously I don't eat it. The thing is, I really like the Coronation sauce, so I've been trying to work out a veggie version and I think I've finally cracked it.

I actually made this last week but forgot to take a picture of it – doh! We enjoyed it so much I made it again for last night's dinner with salad and rosemary potatoes. There's some left over so I think today's lunch is sorted - chunks of baguette filled with Coronation chickpeas and salad. Lovely!


250gm chestnut mushrooms, quartered
1 tbsp olive oil
1 tin chickpeas, drained
50gm salted cashews
2 sticks celery, chopped
2 tbsp mayonnaise
2 tbsp natural yoghurt
1 dsp curry paste
1 dsp mango chutney
1 tbsp toasted flaked almonds
1 tbsp coarsely chopped coriander


Mix the mayo, yoghurt and mango chutney together then set aside while you saute the mushrooms in the olive oil until cooked but not browned, add the curry paste and cook gently for a minute or two. In a large bowl mix the chickpeas, celery, cashews and cooked mushrooms together then stir in the mayo and yoghurt mixture. Sprinkle with chopped coriander and toasted almonds before serving

Serves 2 with enough leftover for lunch next day

Sunday, 13 February 2011

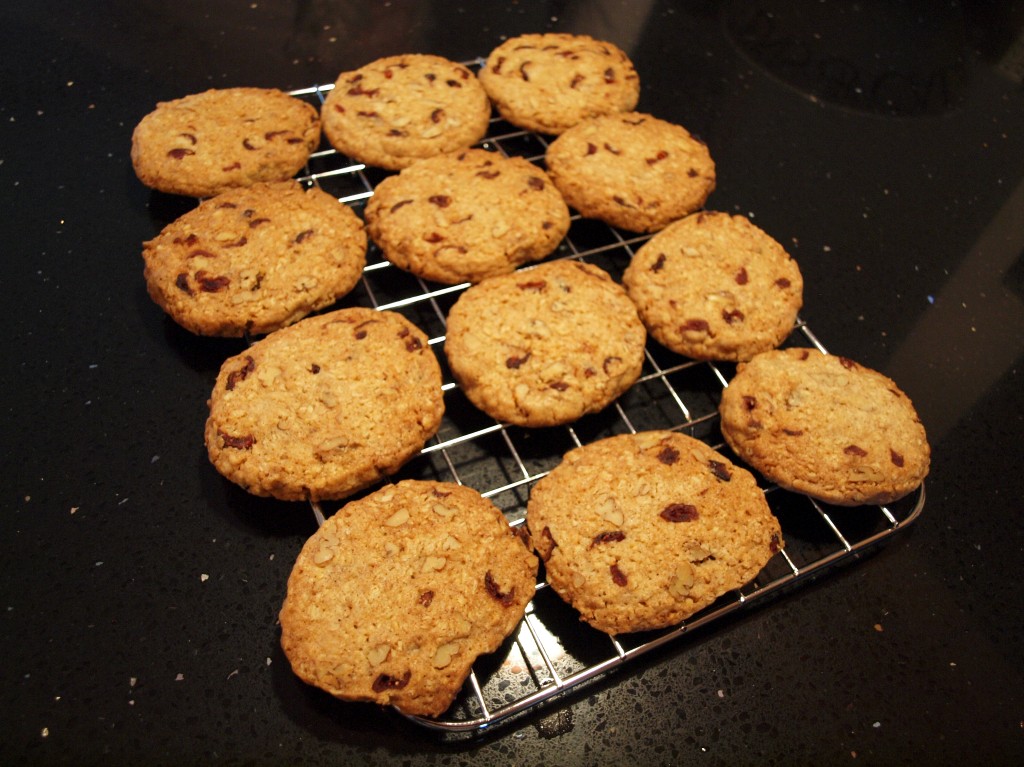
Cranberry Pecan Biscuits

I don’t do a lot of baking and I can’t remember the last time I made biscuits. I don't even make cakes very often but biscuits seem to have passed me by completely. However, I saw this recipe the other day and it looked so easy and quick I just had to have a go. It was obviously one of those ‘meant to be’ moments because, amazingly, I had all the ingredients in the pantry already.

I'm not wild about blueberries so I replaced them with cranberries, but other than that I followed the recipe exactly; I was too nervous to do my usual tweaking, in case I ended up with one big biscuit the same size as the baking sheet! Next time I make them (there will definitely be a next time!) I'll try raisin and walnut or maybe apricot and almond.

Just one point – the recipe says it makes 12, but I made 22 3-inch biscuits from this mix. God knows how big they would have been if I’d only made 12!

Give them a go, they're brilliant and really easy; actually, they'd be worth doing just for the gorgeous warm cinnamon aroma in the kitchen. It was torture waiting for them to cool down, but they were well worth waiting for.

Wednesday, 5 January 2011

Christmas Nut Roast

Just one more post about festive cooking (until next year!)

This isn’t the greatest picture of my Christmas Nut Roast but I’m sure you get the idea; I couldn't hang around taking pics because I wanted to dive in to my lunch! I made the most amazing gravy to go with it and believe me, I’ve tried more than a few recipes over the years. This one is by far the best; give it a go, you won’t be disappointed. I've put a link for it after the recipe.


Loaf mixture:
½ a large onion, finely chopped
1 tbsp olive oil
200g whole mixed nuts
175g fresh wholemeal breadcrumbs
75g mature cheddar, grated
200ml stock
1 egg, beaten
½ tsp Marmite
½ tsp dried oregano

Filling:
½ a large onion, finely chopped
100g finely chopped mushrooms
1 tbsp olive oil

Sauté half an onion in oil until golden. Grind the nuts in a processor, not too finely. Stir the Marmite into the hot stock and allow to cool. Combine all the dry loaf ingredients, add the stock, sautéed onion and beaten egg and mix well. The mixture should be fairly slack. Sauté the remaining half of the onion and the mushrooms together until golden. Line a 1lb loaf tin with baking parchment; put half the loaf mixture into the tin, cover with the onion and mushroom mixture and finish with the rest of the loaf mixture. Bake at 180C for 45 minutes, or until golden brown.

Serve with roast potatoes, vegetables of choice and veggie gravy. Also nice cold (if there’s any left!) with chutney or salad and it makes a killer sandwich with Dijon mustard and a pickled onion on the side!

Serves 4

http://www.cottagesmallholder.com/annas-famous-onion-gravy-recipe-257

Friday, 12 November 2010

Roast Stuffed Butternut

In the winter when the weather's cold and miserable I find I always seem to cook the same old, same old, but I'm trying to break out of that rut.

It was blowing a gale out there last night; perfect conditions for having a rummage in the fridge and seeing what I could find to cook up something warming and different.

I love butternut squash, but I usually only use them for soup or chopped into chunks and cooked alongside roast potatoes. I've never used one as the basis of a main meal before, but I certainly will in future!

This recipe is infinitely adaptable; for the stuffing you can use whatever veg you have to hand and, although I used Feta, I suspect it would work equally well with Brie, Camembert or Mozzarella and if you don't have pine nuts, throw in a few chopped cashews or even olives instead.

See, I said it was adaptable.


1 butternut squash
2 tbsp olive oil
1 garlic clove, chopped
6 button mushrooms, halved
1 small courgette
½ small red pepper
2 large shallots, peeled and cut into quarters
2 tomatoes quartered
2 tbsp pine nuts
100g feta, chopped into small chunks
1 tbsp grated parmesan-style cheese

Cut the squash in half lengthways and scoop out the seeds and stringy bits. Drizzle the squash with half the olive oil and put the chopped garlic in the cavities. Roast for 40 minutes at 200C until tender.

Meanwhile, chop the courgette and pepper into smallish chunks, mix with the shallot wedges, mushrooms and remaining olive oil, then roast for 20 minutes. Put the cooked veg in a large bowl, add the tomato quarters, pine nuts and feta chunks; mix well then pile onto the cooked squash halves. Sprinkle with the 'parmesan' and put back in the oven for a further 15 mins.

If you're absolutely ravenous you could serve some garlic bread with this, but to be honest it was very filling on its own.

Serves 2

Tuesday, 9 November 2010

'Not' Sausage Rolls


I've heard it said that people are either good at making cakes or they're good at making pastry. Well, to my shame, I have to tell you that I am completely rubbish at pastry; I've tried, believe me, but I think I'm just too heavy-handed and impatient. Pastry I've made in the past has been successfully used by the local council as paving slabs - I think you get my drift...! However, my lack of skill in the pastry department does not deter me; I just cheat and buy the ready made stuff - thank goodness for Jus-rol!

I make these little rolls every Christmas and they're brilliant, if I say so myself; the 'sausage' filling is a tweaked nut-roast recipe. I've never yet met anyone who doesn't love them - they disappear as fast as you can bake them!

They couldn't be easier to make and you can freeze them uncooked and bake as needed; I've taken to keeping a few in the freezer to whip out for a quick lunch. Served warm with some spicy chutney or a few olives, you can't go wrong; they're also nice for a summer picnic or lunchbox.

This post is especially for my lovely daughter-in-law. She knows who she is!

(Not...!) Sausage Rolls

1 large onion, chopped finely
2 tbsp olive oil
200g ground mixed nuts
100g grated mature cheddar
75g soft breadcrumbs
1 tsp paprika
1 tsp dried oregano (or any other herb you have to hand)
1 egg, beaten with 1 tbsp water
a 500g pack of ready-rolled puff pastry
a little milk

Fry the onion in the oil until softened and golden. Mix all the dry filling ingredients together in a large bowl, add the fried onion, then bind with the beaten egg and water. It may look and feel a bit dry but don't worry, it’ll be fine. Press the mixture together and roll it into three long sausage shapes. Cut the sheet of pastry into three equal strips and roll up the sausage shapes in the pastry strips, making sure that the join is underneath, dampen the edge of the pastry with a little milk and press firmly together. It'll be quite a tight fit to get all the filling in but with perseverance I usually manage it!

Cut the rolls into 3cm pieces and brush with milk, then bake on a greased baking tray at 200C for 15-20 mins. (I usually line the tin with baking parchment - it saves on washing up!)

If baking from frozen cook for 20-25 mins.