Sorry about the slightly iffy picture of this Three Bean and Asparagus salad; I made it last weekend when DS, DDIL and Gorgeous Granddaughter came round for lunch; everything else was already on the table so I didn’t have time to faff about. I was originally planning to do a cold lunch because I was expecting it to be warm and sunny – proper summer weather; needless to say it was cool and showery…grrr!
Anyway, we had the salad along with a Nut Roast Wellington and some of our crop of new potatoes from the garden cooked with olive oil and rosemary. Our potatoes have done really well this year – I think they enjoyed all the rain we had in May and June, unlike my tomatoes, poor things, which are looking as sick as a pig. Heigh-ho…you can’t have everything.
We’re having a heatwave for the next few days, apparently; it's about 4pm and I’m sitting here in the gloom with the shutters and windows closed to keep the heat out. It’s 29°C – ghastly! I might have to put my thinking cap on and come up with a few more salads to keep us cool.
150g fine green beans
125g fine asparagus
125g edamame beans
150g baby broad beans
100g feta
40g hazelnuts
1 tsp Dijon mustard
1 tsp runny honey
1 tbsp sherry vinegar
2 tbsp walnut oil
1 tsp lemon juice
ground black pepper
Roast the hazelnuts in the oven at 200C for five minutes then set aside to cool.
Put all the dressing ingredients into a small jam jar and shake like billy-o until emulsified.
Cook the green beans and asparagus together in boiling water for 1 minute; drain and run under cold water then drain well.
Cook the edamame beans and broad beans together for three minutes; drain and refresh in cold water then drain well.
Arrange the green beans and asparagus on a shallow serving dish followed by the edamame and broad beans.
Crumble the feta over the top and sprinkle with the chopped hazelnuts.
Drizzle over the dressing and serve immediately.
Serves 4 as a side dish.
Search This Blog
Showing posts with label Cheese. Show all posts
Friday, 18 July 2014
Tuesday, 15 April 2014
Asparagus and Cheese Tart
I’m not someone who slavishly buys and eats ‘locally’ and ‘seasonally’; if something is in the shops, and I like the look of it, I really don’t care if it’s been flown from Timbuktu or from the Moon, quite frankly.
There are a few things though, that are so much better when they’re grown in season in the UK: strawberries and asparagus spring immediately to mind, closely followed by Victoria plums. I’ll have to wait a while yet for the strawbs and plums, but I found the first of this year’s English asparagus available at the end of last week. Yum.
The timing was brilliant because we had DS, DDIL and Gorgeous Granddaughter coming for lunch on Sunday, so I made this Asparagus and Cheese Tart served with new potatoes and a mixed salad; I have to say it went down very well. It must have done - we ate the entire thing!
I used a 14” x 5” rectangular tin (which I bought years ago in a fit of baking enthusiasm, but had only used once!) but there’s no reason why you shouldn’t use an 8” round tart tin – the amounts would be roughly the same, give or take.
I'd planned to use soft goat's cheese in this recipe but I couldn’t lay my hands on a vegetarian one for love nor money; yes, I know, you wouldn’t think it’d be too difficult but there you go… however, if you’re luckier than me I think goat’s cheese would work really well. I used a mature cheddar but any well-flavoured cheese would be fine.
Apologies for the slightly iffy pic…it was the result of a lethal combination of a new camera and being in a hurry.
500g block of ready-made shortcrust pastry
300g asparagus, trimmed
100g mature cheddar (or goat’s cheese)
3 eggs, beaten
250ml milk
a few grinds of black pepper
1 tbsp snipped chives
Turn the oven on to 180C.
Roll out the pastry to fit your tin, line the pastry case with baking parchment weighed down with baking beans or uncooked rice and bake for 15 minutes.
Take off the paper and beans then brush the surface of the pastry with a little of the beaten egg. Return the pastry case to the oven for 5 minutes.
Mix the remaining egg with the milk and a few grinds of pepper. Lay the asparagus spears in the tin, cutting to fit if necessary; sprinkle with the grated cheese and chopped chives then strain the egg mixture carefully over the top.
Bake for about 30 minutes until the filling is puffy and golden.
Transfer to a wire rack and cool for 15-20 minutes before serving.
There are a few things though, that are so much better when they’re grown in season in the UK: strawberries and asparagus spring immediately to mind, closely followed by Victoria plums. I’ll have to wait a while yet for the strawbs and plums, but I found the first of this year’s English asparagus available at the end of last week. Yum.
The timing was brilliant because we had DS, DDIL and Gorgeous Granddaughter coming for lunch on Sunday, so I made this Asparagus and Cheese Tart served with new potatoes and a mixed salad; I have to say it went down very well. It must have done - we ate the entire thing!
I used a 14” x 5” rectangular tin (which I bought years ago in a fit of baking enthusiasm, but had only used once!) but there’s no reason why you shouldn’t use an 8” round tart tin – the amounts would be roughly the same, give or take.
I'd planned to use soft goat's cheese in this recipe but I couldn’t lay my hands on a vegetarian one for love nor money; yes, I know, you wouldn’t think it’d be too difficult but there you go… however, if you’re luckier than me I think goat’s cheese would work really well. I used a mature cheddar but any well-flavoured cheese would be fine.
Apologies for the slightly iffy pic…it was the result of a lethal combination of a new camera and being in a hurry.
500g block of ready-made shortcrust pastry
300g asparagus, trimmed
100g mature cheddar (or goat’s cheese)
3 eggs, beaten
250ml milk
a few grinds of black pepper
1 tbsp snipped chives
Turn the oven on to 180C.
Roll out the pastry to fit your tin, line the pastry case with baking parchment weighed down with baking beans or uncooked rice and bake for 15 minutes.
Take off the paper and beans then brush the surface of the pastry with a little of the beaten egg. Return the pastry case to the oven for 5 minutes.
Mix the remaining egg with the milk and a few grinds of pepper. Lay the asparagus spears in the tin, cutting to fit if necessary; sprinkle with the grated cheese and chopped chives then strain the egg mixture carefully over the top.
Bake for about 30 minutes until the filling is puffy and golden.
Transfer to a wire rack and cool for 15-20 minutes before serving.
Wednesday, 8 May 2013
Leek, Goat's Cheese and Walnut Tart
I think we’ve finally seen the last of the really cold weather, although even last week we were having overnight frosts! The Bank Holiday weekend was lovely though and we really took advantage of the weather; the raised beds in the garden are finally planted up with potatoes, sugar-snap peas, French beans, carrots, beetroots, courgettes, red and white onions and plenty of herbs; the tomato plants are sitting snugly in their propagator in the shed waiting to be put out when they’re a bit bigger.
I’ve already picked loads of rhubarb but we haven’t had a single blossom on the plum or greengage trees, however the damson has had plenty and the apple tree is absolutely covered in the most beautiful pink and white blossom as I write, so hopefully we’ll have a better crop on those than last year.
It’s been so nice to have a few days of eating more summery food again; I was beginning to think I’d be cooking soup, curries and chilli sans carne forever! My sister and BIL came to us for lunch on Sunday. My first thought was a tagine but then the weather warmed up a bit so I ditched that idea and went for something a little more spring-like – a lemony leek and goat's cheese tart served with rosemary-roast new potatoes and a warm spring salad.
A couple of things I changed in the recipe for the tart: I doubled the amount of leeks because I love them and I halved the amount of cheese. People always tend to overdo the cheese in vegetarian recipes – I think they’re afraid we’ll go short of protein!
I’ve already picked loads of rhubarb but we haven’t had a single blossom on the plum or greengage trees, however the damson has had plenty and the apple tree is absolutely covered in the most beautiful pink and white blossom as I write, so hopefully we’ll have a better crop on those than last year.
It’s been so nice to have a few days of eating more summery food again; I was beginning to think I’d be cooking soup, curries and chilli sans carne forever! My sister and BIL came to us for lunch on Sunday. My first thought was a tagine but then the weather warmed up a bit so I ditched that idea and went for something a little more spring-like – a lemony leek and goat's cheese tart served with rosemary-roast new potatoes and a warm spring salad.
A couple of things I changed in the recipe for the tart: I doubled the amount of leeks because I love them and I halved the amount of cheese. People always tend to overdo the cheese in vegetarian recipes – I think they’re afraid we’ll go short of protein!
Friday, 30 November 2012
Broccoli and Stilton Soup
It’s been absolutely flippin’ freezing here today! Our car is actually black but, parked on the drive this morning, it was completely white – it was quite an impressive frost. Not the best day for putting up the outside Christmas lights, but at least it was dry as well as beautifully sunny.
As soon as the weather gets cold my thoughts turn to soup; there’s nothing so quite so warming and comforting as a bowl of hot soup and a chunk of fresh bread.
This is one that Mr Simply Veg has wanted me to make for some time (he likes blue cheese and I don’t; although I love most cheeses there is just something about the blue variety that gives me the willies!) so I finally gave in. I don’t think I’ll ever be able to eat and enjoy a piece of Stilton at the end of a meal but in this it was lovely. The cheese flavour wasn’t overpowering but it gave a real savouriness to what could otherwise have been a fairly bland soup. Looks like lunch is sorted for the next couple of days...
1 tbsp olive oil
1 onion, chopped
2 sticks celery, finely chopped
1 large floury potato, diced
1l stock
1 clove garlic, crushed
1 large head of broccoli
½ tsp dried thyme
125g Stilton, crumbled
1 tbsp crème fraiche
Sauté the onion, celery and potato for 5 minutes in the olive oil in a large saucepan; chop the thick stalk off the broccoli, dice and add to the other vegetables in the pan along with the crushed garlic and sauté for a further couple of minutes. Add the stock, bring to the boil and simmer for 10-15 minutes until the veg are almost tender.
Roughly chop the rest of the broccoli, add to the pan with the thyme and simmer for another 5 minutes. Blitz with a stick blender until smooth, adding a little more stock if necessary.
Keep back a tablespoon of the crumbled Stilton for garnish, then stir the rest of it and the crème fraiche into the soup.
This was based loosely on BBC Good Food's recipe.
Serves 6
As soon as the weather gets cold my thoughts turn to soup; there’s nothing so quite so warming and comforting as a bowl of hot soup and a chunk of fresh bread.
1 tbsp olive oil
1 onion, chopped
2 sticks celery, finely chopped
1 large floury potato, diced
1l stock
1 clove garlic, crushed
1 large head of broccoli
½ tsp dried thyme
125g Stilton, crumbled
1 tbsp crème fraiche
Sauté the onion, celery and potato for 5 minutes in the olive oil in a large saucepan; chop the thick stalk off the broccoli, dice and add to the other vegetables in the pan along with the crushed garlic and sauté for a further couple of minutes. Add the stock, bring to the boil and simmer for 10-15 minutes until the veg are almost tender.
Roughly chop the rest of the broccoli, add to the pan with the thyme and simmer for another 5 minutes. Blitz with a stick blender until smooth, adding a little more stock if necessary.
Keep back a tablespoon of the crumbled Stilton for garnish, then stir the rest of it and the crème fraiche into the soup.
This was based loosely on BBC Good Food's recipe.
Serves 6
Monday, 1 October 2012
Thai Green Curry
It seems ages since I last posted; I wouldn’t like you to think we've been fading away and not eating at
all for the last three weeks or so, it's just that I haven't been cooking anything new and have just stuck to easy-peasy stuff that I can do with my eyes closed and which doesn’t
require much thought.
I did manage to make some more chutney, though, using all the remaining fruit from the garden, I’ve also made loads of plum compote and I have six jars of Christmas mincemeat maturing quietly in the pantry, so I haven’t been entirely idle.
Before my recent cooking slump I had finally tracked down
some Thai green curry paste. I’d been after some for ages, but trying to find one that's veggie was a bit like searching for the holy grail. Waitrose, god bless ‘em,
came up trumps so a few weeks ago I added tofu, assorted veg, coconut milk and
palm sugar to some of the paste and made what can only be described as a very
mediocre meal…I was so disappointed; best thing I can say is, it was OK...ish.
1 pack of paneer
1 tbsp vegetable oil
125g sugar-snap peas, halved
125g baby corn, halved
150g small broccoli florets
1 red pepper, chopped into largish pieces
3 kaffir lime leaves, chopped
2 tbsp Thai green curry paste
1 tsp palm sugar
1 400g tin of coconut milk
handful of coriander, chopped
juice of half a lime
Chop the paneer into little batons (about half the size of
your little finger) and fry in the vegetable oil in a large pan until golden on
all sides; drain well and set aside on kitchen paper whilst you cook the curry.
I did manage to make some more chutney, though, using all the remaining fruit from the garden, I’ve also made loads of plum compote and I have six jars of Christmas mincemeat maturing quietly in the pantry, so I haven’t been entirely idle.
Undaunted, I ventured into the kitchen on Friday to have
another go; instead of tofu I used paneer (I seem to be off tofu at the moment
for some reason) I also upped the ration of curry paste to give it a bit more
zing, I changed the mix of veg and added loads of chopped coriander and a good
squeeze of lime juice. This time it wasn’t mediocre, it was bloody brilliant!
You will see at the end of the recipe that I’ve said it serves four…well, it would
have done if the two of us hadn’t eaten it all!
1 tbsp vegetable oil
125g sugar-snap peas, halved
125g baby corn, halved
150g small broccoli florets
1 red pepper, chopped into largish pieces
3 kaffir lime leaves, chopped
2 tbsp Thai green curry paste
1 tsp palm sugar
1 400g tin of coconut milk
handful of coriander, chopped
juice of half a lime
In the same pan, in the residual oil, cook the baby corn,
red pepper and broccoli for a few minutes, add the lime leaves, curry paste,
palm sugar and coconut milk. Stir well and bring to a gentle simmer then
immediately add the sugar snap peas and the cooked paneer; simmer for a few
minutes (you want the veg to still have some ‘bite’). Stir in the coriander and
lime juice and serve with rice.
Serves 4 (or two very greedy people!)
Saturday, 4 August 2012
Roast Vegetable Quesadillas
It’s not been a great couple of weeks for cooking for two reasons:
firstly, we’ve had a guy in doing some decorating in the sitting room and the
kitchen (the entire contents of the pantry were spread across the worktops at
one point; it was as much as I could do to make a sandwich for lunch!) and, secondly, I’ve been busy watching the Olympics…..well, there won’t be another Olympics in the UK in my
lifetime so I thought I’d better make the most of it!
The kitchen is now back up and running again so yesterday I
made some rather tasty Chilli Plum Chutney (recipe to follow) and today for
lunch we had these quesadillas; nice and easy finger food to eat whilst we
watched Jess Ennis and others giving their all in the quest for a gold medal.
I’ve made quesadillas before using up leftover chilli sans
carne but, in the absence of any chilli, I roasted some peppers and a couple of
courgettes and red onions from the garden. I find roast veg are absolutely addictive;
it’s surprising any of them made it into our lunch because I was picking at
them immediately they came out of the oven…! This will make more veg than you need for the quesadillas but the leftovers are brilliant with some herby couscous.
3 mixed peppers
1 large red onion
2 small courgettes
2 tbsp olive oil
¼ tsp cayenne
100g grated mature cheddar
4 soft flour tortillas
4 tbsp soured cream
2 tbsp chopped chives
few grinds black pepper
sprinkle of cayenne
Turn the oven on at 200C
Deseed the peppers and chop them into chunky pieces, cut the courgettes into thick slices on the diagonal, peel the onion and cut it into eighths through the root. Toss the veg together with the olive oil and the cayenne then put them in a shallow baking tray and roast for 20-25 minutes.
Mix the sour cream with the chives and plenty of black pepper, put into a small ramekin and sprinkle with cayenne.
Use the grated cheese, some of the roast veg and the tortillas to make two 'sandwiches'. Place each tortilla sandwich in a dry non-stick frying pan and cook over a medium heat for two or three minutes until the cheese starts to melt then flip over to cook the other side.
Cut into quarters and serve with the sour cream dip.
**You’ve probably already noticed that I’m a massive tennis fan; Andy
Murray is in the singles final tomorrow against some Swiss bloke called Federer
(!) Well, whilst I've been typing this Andy and Laura Robson have just booked a place in the mixed doubles - also tomorrow!! I’m so excited I can barely think straight…!**
Sunday, 22 July 2012
Greek Salad
There was something strange in the sky when we woke up this morning; it was a big round ball that seemed to be giving off a lovely warm brightness. It looked familiar but because it was so long since we’d seen it, I couldn’t be sure…is it....could it be....surely not? Yes….it is.....it’s the sun! Well, bless my boots, I think the summer’s arrived!!
I went into the garden to throw a few words of encouragement to the veg plot and was so taken aback by the unaccustomed summeriness (is that a word?) that I started thinking about lunch in the garden. Something salady was needed, obviously – a chunk of feta in the fridge caught my eye and the words “Greek Salad” popped into my head. Perfect summer food.
I’ve been making this salad for years but I feel I should confess that, having never been to Greece, I wouldn’t know an authentic Greek salad if it jumped up and slapped me so, for purists, my version could probably best be described as Greek-ish.
½ red onion, thinly sliced
2 tbsp olive oil
juice of half a lemon
½ tsp dried oregano
2 large vine ripened tomatoes
5 inch piece of cucumber
200g feta
20-25 kalamata olives
black pepper
olive oil for drizzling
Put the thinly sliced onions in a large salad bowl and mix with the olive oil, lemon juice and dried oregano; I find this short marinating takes some of the ‘sting’ out of the onions.
Chop the cucumber in half lengthways then into chunky half-moons; chop the tomatoes into chunky pieces, discarding the cores; halve the olives. Add cucumber, tomatoes and olives to the salad bowl then crumble over the feta and mix well (use your hands to avoid bruising the cuke).
Drizzle with olive oil and grind over a little black pepper before serving.
This made enough for two with enough left over to fill a couple of wraps for lunch tomorrow.
I went into the garden to throw a few words of encouragement to the veg plot and was so taken aback by the unaccustomed summeriness (is that a word?) that I started thinking about lunch in the garden. Something salady was needed, obviously – a chunk of feta in the fridge caught my eye and the words “Greek Salad” popped into my head. Perfect summer food.
I’ve been making this salad for years but I feel I should confess that, having never been to Greece, I wouldn’t know an authentic Greek salad if it jumped up and slapped me so, for purists, my version could probably best be described as Greek-ish.
½ red onion, thinly sliced
2 tbsp olive oil
juice of half a lemon
½ tsp dried oregano
2 large vine ripened tomatoes
5 inch piece of cucumber
200g feta
20-25 kalamata olives
black pepper
olive oil for drizzling
Put the thinly sliced onions in a large salad bowl and mix with the olive oil, lemon juice and dried oregano; I find this short marinating takes some of the ‘sting’ out of the onions.
Chop the cucumber in half lengthways then into chunky half-moons; chop the tomatoes into chunky pieces, discarding the cores; halve the olives. Add cucumber, tomatoes and olives to the salad bowl then crumble over the feta and mix well (use your hands to avoid bruising the cuke).
This made enough for two with enough left over to fill a couple of wraps for lunch tomorrow.
Wednesday, 18 July 2012
Couscous, Chickpea and Feta Salad
The wet weather goes on here unabated, but there's a rumour going about that we're going to have some decent weather next week just in time for the Olympics – it's only a rumour but we're all so desperate we'll clutch at any straw; if the summer doesn’t hurry up it’ll overlap with autumn if it's not careful! I’m really not a big fan of hot weather, but even I wouldn’t mind seeing a bit of sun; much more rain and we’ll all start going rusty!
Our veg plot has really suffered for lack of warmth and sun; the potatoes and onions have been happy enough but the more summery crops are struggling quite badly. The tomatoes don’t even have a single flower on them, nor the courgettes and the least said about the poor peppers and French beans the better…
Strangely, despite the weather, the salad leaves have been pretty good so I picked some lollo rosso and added it to this salad. This is another one of my Waitrose chiller-cabinet imitations; I can’t for the life of me remember what theirs is called but this is my take on it.
NB: I mentioned the weather above; well, I would have put this post on earlier this evening, but it was raining so hard the local electricity sub-station was knocked out which meant we had no power - it was like a monsoon! Don't you just love these lazy, hazy days of summer....?!
150g couscous
175ml boiling stock
1 tin chickpeas, drained and rinsed
½ small red onion, finely chopped
2 large vine-ripened tomatoes, chopped
2 teaspoons chopped mint
1 heaped tbsp chopped parsley
finely grated zest of ½ a lemon
200g feta, chopped into cubes
4 tbsp olive oil
1 tbsp lemon juice
1 tsp grainy mustard
1 tsp honey
2 tsp finely chopped parsley
salad leaves
Put the couscous in a large bowl, pour in the boiling stock and stir well; cover with a plate and leave for 10 minutes. Fluff up with a fork then carefully stir in the rest of the salad ingredients.
Whisk the dressing ingredients together and drizzle over the salad before serving.
Serve with salad leaves of choice.
Serves 4
Our veg plot has really suffered for lack of warmth and sun; the potatoes and onions have been happy enough but the more summery crops are struggling quite badly. The tomatoes don’t even have a single flower on them, nor the courgettes and the least said about the poor peppers and French beans the better…
Strangely, despite the weather, the salad leaves have been pretty good so I picked some lollo rosso and added it to this salad. This is another one of my Waitrose chiller-cabinet imitations; I can’t for the life of me remember what theirs is called but this is my take on it.
NB: I mentioned the weather above; well, I would have put this post on earlier this evening, but it was raining so hard the local electricity sub-station was knocked out which meant we had no power - it was like a monsoon! Don't you just love these lazy, hazy days of summer....?!
150g couscous
175ml boiling stock
1 tin chickpeas, drained and rinsed
½ small red onion, finely chopped
2 large vine-ripened tomatoes, chopped
2 teaspoons chopped mint
1 heaped tbsp chopped parsley
finely grated zest of ½ a lemon
200g feta, chopped into cubes
4 tbsp olive oil
1 tbsp lemon juice
1 tsp grainy mustard
1 tsp honey
2 tsp finely chopped parsley
salad leaves
Put the couscous in a large bowl, pour in the boiling stock and stir well; cover with a plate and leave for 10 minutes. Fluff up with a fork then carefully stir in the rest of the salad ingredients.
Whisk the dressing ingredients together and drizzle over the salad before serving.
Serve with salad leaves of choice.
Serves 4
Thursday, 5 July 2012
Aubergine and Mushroom Lasagne
You will see from the second picture on this post why I don’t often make lasagne…apart from making it in individual dishes, (which I don’t have) how the hell do you serve it so that it looks as good on the plate as it does in the dish? Why does it never sit nicely on the plate so that you can see the separate layers? Answers on a postcard, please, because I’m damned if I know!
Despite its slightly iffy appearance this lasagne had a really nice depth of flavour; we both enjoyed it a lot. I love aubergine in any way shape or form; put it together with mushrooms, pasta and a cheesy sauce and I’m a very happy bunny indeed.
Incidentally, there was some of the aubergine sauce left over so I might have a go at making a quesadilla-type thingy for lunch tomorrow; handy to eat whilst watching Andy Murray in the semis at Wimbledon. I’ll be yelling at the television and my nerves will be shredded; definitely not the type of thing to watch on an empty stomach….Come on, Andy!!
1 medium aubergine, chopped into large dice
250g chestnut mushrooms, halved or quartered
1 large red onion, chopped
2 tbsp olive oil
2 cloves garlic, crushed
1 tin chopped tomatoes
1 tbsp tomato paste
75ml red wine
1 tsp dried basil
1 tsp dried oregano
4 or 5 sheets of fresh lasagne
250ml milk
20g butter
25g plain flour
1 tsp Marigold Bouillon stock powder
75g mature cheddar, grated
2 tbsp grated parmesan-style cheese
Heat the olive oil in a large pan; add the aubergine, mushrooms and onion and sauté over a medium heat for 10 minutes, add the rest of the sauce ingredients, bring to the boil then simmer gently for 30 minutes.
When cooked, put a layer of sauce in the base of an ovenproof dish then cover with a sheet of lasagne; repeat three or four times ending with a sheet of lasagne.
Heat oven to 180C
Put the milk, butter, flour and Marigold stock powder into a small saucepan over a medium heat and bring to the boil, stirring constantly until the sauce thickens; simmer for 5 minutes. Take off the heat and stir in the cheddar; pour the cheese sauce over the top layer of lasagne then sprinkle with grated ‘parmesan’.
Bake at 180C for 45 minutes until golden and bubbling
Serves 2
Despite its slightly iffy appearance this lasagne had a really nice depth of flavour; we both enjoyed it a lot. I love aubergine in any way shape or form; put it together with mushrooms, pasta and a cheesy sauce and I’m a very happy bunny indeed.
Incidentally, there was some of the aubergine sauce left over so I might have a go at making a quesadilla-type thingy for lunch tomorrow; handy to eat whilst watching Andy Murray in the semis at Wimbledon. I’ll be yelling at the television and my nerves will be shredded; definitely not the type of thing to watch on an empty stomach….Come on, Andy!!
1 medium aubergine, chopped into large dice
250g chestnut mushrooms, halved or quartered
1 large red onion, chopped
2 tbsp olive oil
2 cloves garlic, crushed
1 tin chopped tomatoes
1 tbsp tomato paste
75ml red wine
1 tsp dried basil
1 tsp dried oregano
4 or 5 sheets of fresh lasagne
250ml milk
20g butter
25g plain flour
1 tsp Marigold Bouillon stock powder
75g mature cheddar, grated
2 tbsp grated parmesan-style cheese
Heat the olive oil in a large pan; add the aubergine, mushrooms and onion and sauté over a medium heat for 10 minutes, add the rest of the sauce ingredients, bring to the boil then simmer gently for 30 minutes.
When cooked, put a layer of sauce in the base of an ovenproof dish then cover with a sheet of lasagne; repeat three or four times ending with a sheet of lasagne.
Heat oven to 180C
Put the milk, butter, flour and Marigold stock powder into a small saucepan over a medium heat and bring to the boil, stirring constantly until the sauce thickens; simmer for 5 minutes. Take off the heat and stir in the cheddar; pour the cheese sauce over the top layer of lasagne then sprinkle with grated ‘parmesan’.
Bake at 180C for 45 minutes until golden and bubbling
Serves 2
Friday, 8 June 2012
Stuffed Baguettes
This is one of those ‘it shouldn’t work…. but it does’
recipes. I saw it on the now defunct BBC Messageboard ages ago - thank you AlisonWright. It sounded interesting but I was a bit doubtful to be
honest; I finally got round to giving it a go when we had my sister and
brother-in-law round for a ‘kitchen-table’ type lunch a couple of weeks ago.
Well, I'm happy to say, the baguettes went down a storm. The original recipe was far too meaty
for my liking so a few adaptations were necessary but I kept to the basic recipe as
much as possible.
They’re quite filling so you really only need a side salad
to go with them or possibly some decent chutney and a few olives.
This recipe is definitely a keeper and will be
making further appearances throughout the summer. Incidentally, I use the word
‘summer’ very loosely; it’s blowing a gale and throwing it down with rain here at
the moment! (Don't tell anyone, but I've got the central heating on...!)
4 part-baked baguettes
1 large onion, chopped
1 tbsp olive oil
10 sun-dried tomatoes in oil, chopped
½ tsp dried oregano
200g mature cheddar cheese, grated
2 tbsp chopped chives
1 tbsp chopped parsley
4 eggs
2 tsp Dijon
mustard
Fry the onion in the olive oil until softened and golden;
set aside to cool. Slice the tops off the baguettes lengthways and discard then
tear the bread from the centres to leave you with four canoe shapes; leave the
walls of the baguettes about 1cm thick – if you make them too thin they’ll
collapse when you cook them….trust me, I know! Crumble this bread into a large
bowl; mix in the sun-dried tomatoes, oregano, cheese, chopped herbs and cooled fried
onion. Beat the eggs with the mustard and stir into the breadcrumb mix.
Spoon this mixture into the four bread shells and place on a
baking sheet, making sure they’re level.
Bake for 15-20 mins at 180C until golden.
Cut into three wedges on the diagonal before serving with
salad.
Monday, 21 May 2012
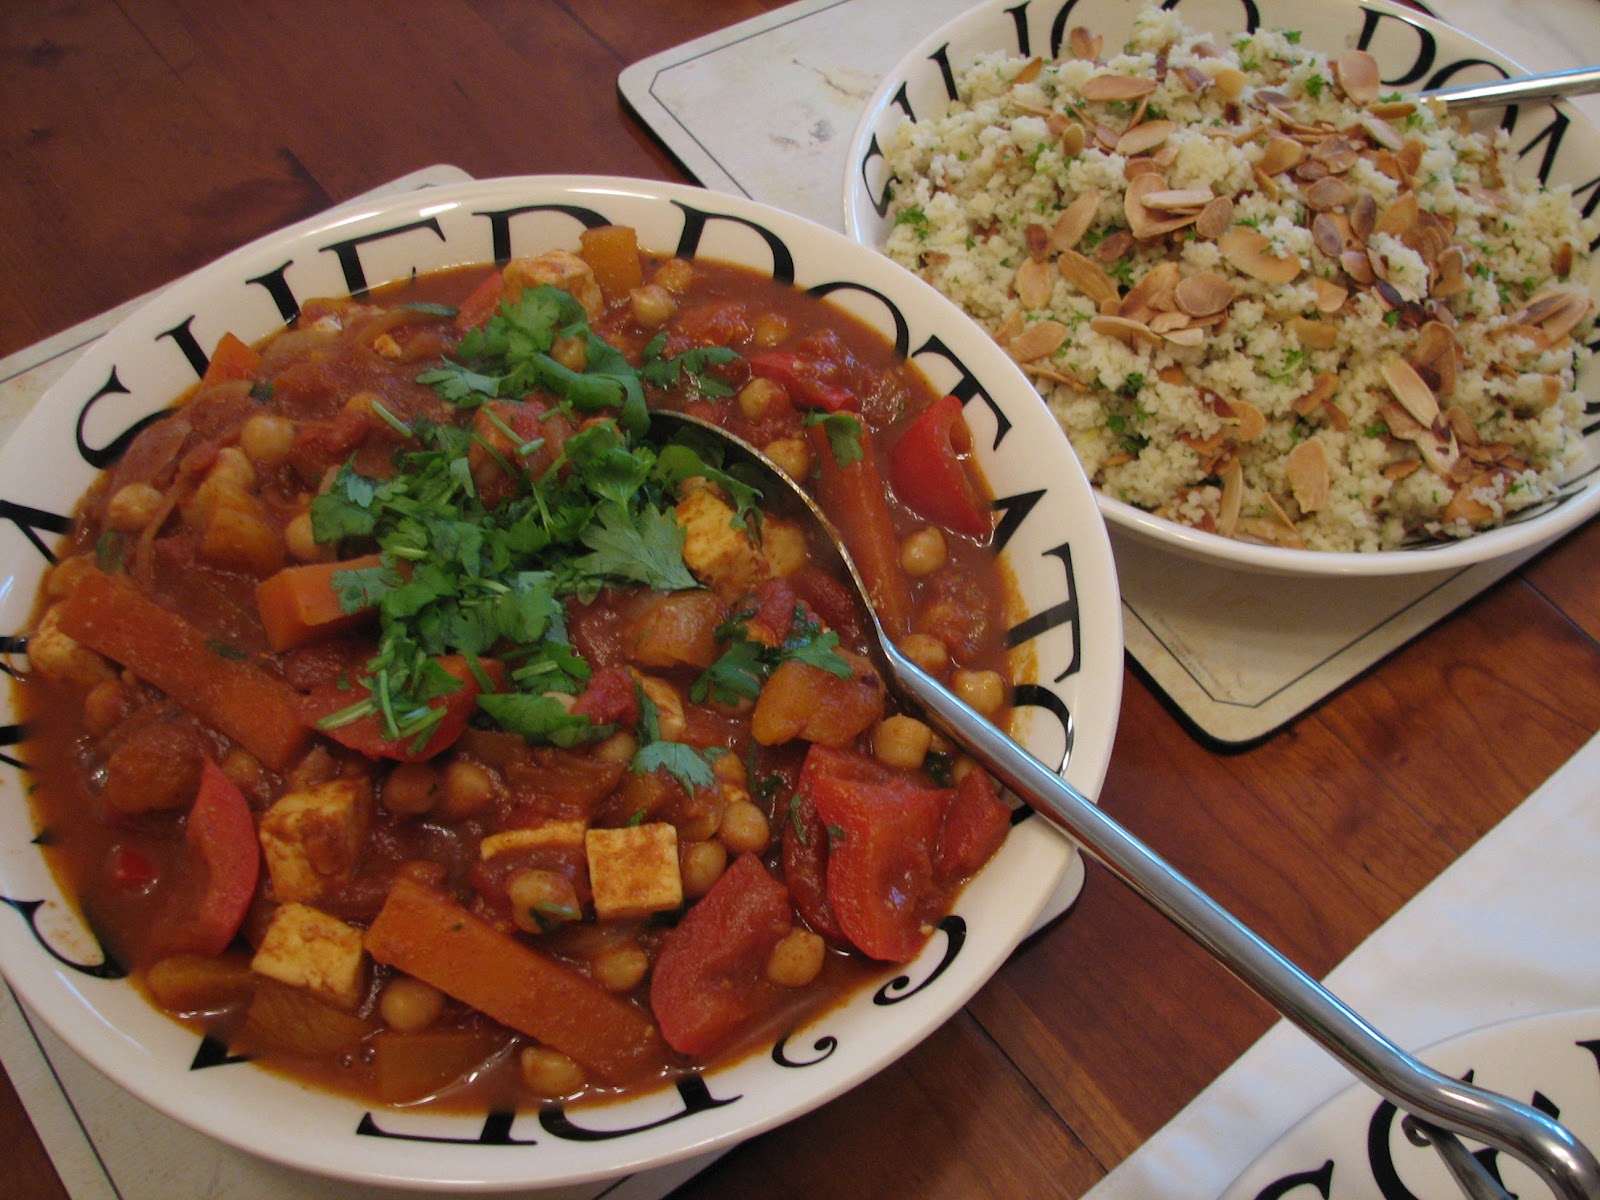
Fruity Tagine with Lemon and Almond Couscous
The weather here has been awful for the last few days, constantly grey and cold, nothing like May should be at all. In a spirit of optimism we planted a whole lot of vegetable seeds last week but it’s been so chilly I’m not entirely convinced they’ll survive. However, there are reports of things warming up a bit later in the week; hmm…I’ll believe it when I see it!
So…what to eat? It’s too cold for light summery meals but I feel heavier winter meals should be over by now. I just didn’t know what to do for dinner last night; it was a case of opening the fridge to see what inspired me.
I finished up making this tagine; I’ve followed tagine recipes in the past that I’ve not been too impressed with, they just didn’t seem to do it for me, so this time I made it up as I went along, adding more of this and less of that to suit our taste. I make no claims as to its authenticity (I know you don’t usually find paneer in a tagine!) but we enjoyed it and I’ll definitely make it again.
2 tbsp olive oil
1 large red onion, peeled and sliced
2 cloves garlic, crushed
2 tsp each of cumin, paprika and cinnamon
½ tsp chilli flakes
1 large carrot, peeled and cut into batons
1 red pepper, cut into chunks
1 tin chopped tomatoes
400ml stock
1 tbsp honey
250g paneer, cubed
1 tin chickpeas, drained
100g dried apricots, halved
handful of chopped coriander
200g couscous
275ml boiling stock
zest and juice of 1 lemon
50g toasted flaked almonds
handful of chopped parsley
Heat the oil in a large pan and fry the onion over a medium heat for five minutes; add the garlic and the spices and cook for a further minute or two.
Add everything else, except the chopped coriander, stir well and bring to the boil; pop a lid on and turn the heat down. Leave to simmer gently for 45 minutes.
About 10 minutes before the tagine is ready put the couscous, zest and juice of the lemon in a large bowl; add the boiling stock, stir once, cover the bowl with a plate and leave for 8-10 minutes. When all the stock has been absorbed, fluff up the couscous with a fork and stir in the toasted almonds and the chopped parsley.
Stir ¾ of the coriander into the tagine before serving and sprinkle the rest of it on top.
Serves 4
So…what to eat? It’s too cold for light summery meals but I feel heavier winter meals should be over by now. I just didn’t know what to do for dinner last night; it was a case of opening the fridge to see what inspired me.
I finished up making this tagine; I’ve followed tagine recipes in the past that I’ve not been too impressed with, they just didn’t seem to do it for me, so this time I made it up as I went along, adding more of this and less of that to suit our taste. I make no claims as to its authenticity (I know you don’t usually find paneer in a tagine!) but we enjoyed it and I’ll definitely make it again.
2 tbsp olive oil
1 large red onion, peeled and sliced
2 cloves garlic, crushed
2 tsp each of cumin, paprika and cinnamon
½ tsp chilli flakes
1 large carrot, peeled and cut into batons
1 red pepper, cut into chunks
1 tin chopped tomatoes
400ml stock
1 tbsp honey
250g paneer, cubed
1 tin chickpeas, drained
100g dried apricots, halved
handful of chopped coriander
200g couscous
275ml boiling stock
zest and juice of 1 lemon
50g toasted flaked almonds
handful of chopped parsley
Heat the oil in a large pan and fry the onion over a medium heat for five minutes; add the garlic and the spices and cook for a further minute or two.
Add everything else, except the chopped coriander, stir well and bring to the boil; pop a lid on and turn the heat down. Leave to simmer gently for 45 minutes.
About 10 minutes before the tagine is ready put the couscous, zest and juice of the lemon in a large bowl; add the boiling stock, stir once, cover the bowl with a plate and leave for 8-10 minutes. When all the stock has been absorbed, fluff up the couscous with a fork and stir in the toasted almonds and the chopped parsley.
Stir ¾ of the coriander into the tagine before serving and sprinkle the rest of it on top.
Serves 4
Wednesday, 16 May 2012
Gnocchi Bake
I used ready-made gnocchi here because I wanted a quick
dinner after we’d been faffing around in the garden planting seeds (carrot, beetroot and courgette, since you ask). Yes, I know gnocchi is easy to make and I’m being very lazy,
but I won’t tell anyone if you won’t!
350ml milk
25g butter
30g plain flour
1 tsp Marigold Bouillon stock powder
100g cheddar cheese, grated
This is pure comfort food; easy, quick and incredibly tasty.
Serve with a tomato and red onion salad dressed with some olive oil and a splash of balsamic; add a mindless telly programme and a glass of something cold (that'll be water for me...the wine is for Mr Simply Veg) put your
feet up on the sofa and enjoy.
250g gnocchi (½ a pack)
1 head of broccoli (about 350g)350ml milk
25g butter
30g plain flour
1 tsp Marigold Bouillon stock powder
100g cheddar cheese, grated
Break the broccoli into florets. Bring a large pan of water
to the boil; add the gnocchi to the boiling water, when they start to bob to
the surface add the broccoli and cook for 1 minute exactly. Drain well and
plunge into a bowl of cold water to halt the cooking process; drain again and
put to one side while you make the cheese sauce.
Put the milk, butter, flour and Marigold stock powder into a
saucepan over a medium heat and bring to the boil, stirring constantly with a wooden
spoon until the sauce thickens; simmer for 5 minutes. Take off the heat and
stir in half the cheddar. Stir the gnocchi and broccoli carefully into the
cheese sauce.
Tip into an ovenproof dish and top with the rest of the grated
cheddar. Bake at 200C for 15 minutes until bubbling and golden.
Saturday, 7 January 2012
Mushroom Pâté
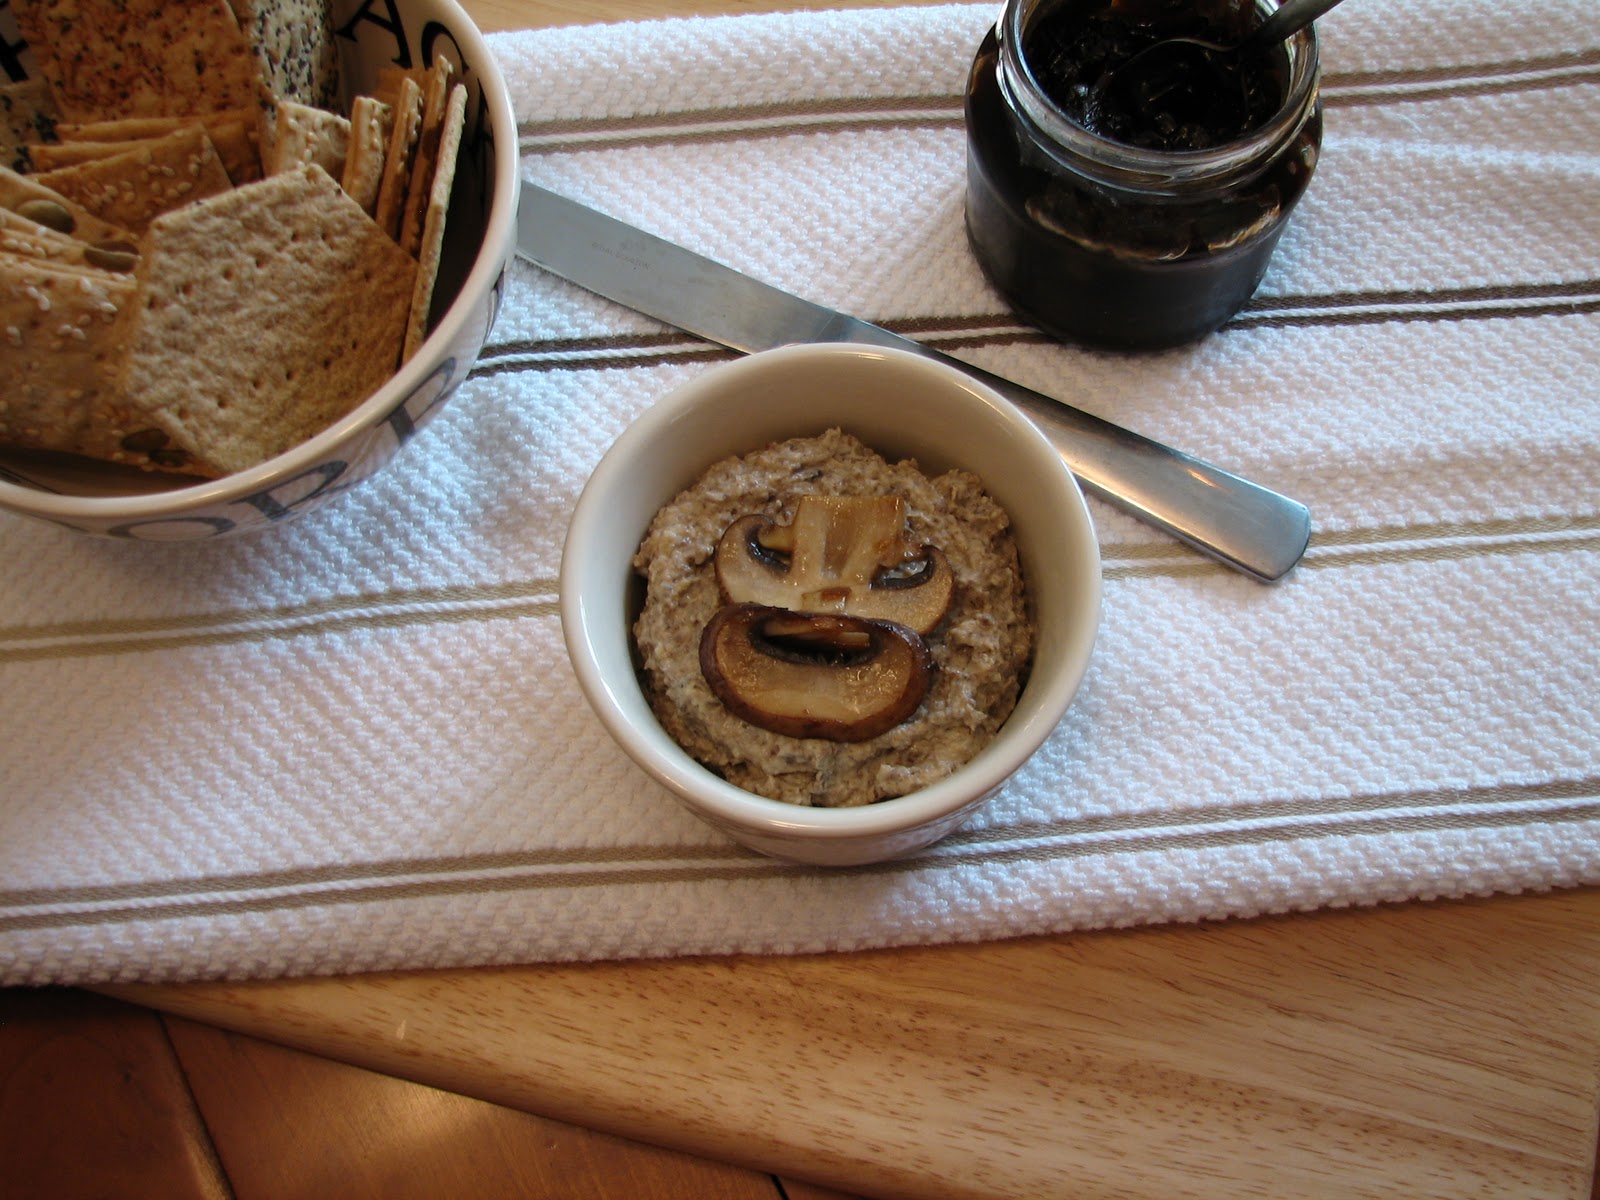
I was really quite pleased with this mushroom pâté, it’s one of those things that’s so easy to do but, inexplicably, I’ve always bought it (at ridiculous supermarket prices!) instead of making it.
I used ground almonds to give it texture and a bit more body and chestnut mushrooms to give a more intense flavour. It was really handy to have in the fridge over the festive period. We had some with grilled ciabatta; it was great with rocket in a sandwich and it was also nice with crackers, a few tomatoes and a dollop of red onion marmalade. Multi-talented, easy and inexpensive…what more could you want?
I have to be honest here, this isn’t the pâté I made at Christmas, it’s the one I made this morning! On Christmas Eve I took some nice pics of it on the dining table with the Christmas tree in the background, but somehow I managed to delete the images before I’d uploaded them onto my laptop. Duh…muppet! Anyway, this is such a great recipe it was a good excuse to make it again just so that I could take its picture.
50g butter, divided into two 25g pieces
1 small onion, finely chopped
250g chestnut mushrooms, sliced
1 clove garlic, chopped
100g cream cheese
25g ground almonds
2 pinches of cayenne
¼ tsp of paprika
a couple of grinds of black pepper
1 tsp brandy
a few mushroom slices sautéed in butter
Heat the first 25g of butter in a saucepan and fry the onion gently for 5 minutes; add the mushrooms, turn them in the butter, put a lid on the pan and cook gently for 15 minutes. Remove the lid and cook until almost all the liquid has bubbled away. Take off the heat, stir in the second 25g of butter and allow to cool for 15 minutes.
Put the cooled buttery mushrooms, cream cheese, ground almonds, cayenne, paprika, black pepper and brandy in the food processor and blend until smooth.
Scoop the pâté into two large or four small ramekins and top with a couple of sautéed mushroom slices. Cover and chill for at least 3 hours before serving with ciabatta, crackers, grissini or crudités.
Serves 4
Saturday, 19 November 2011
Nut Roast Wellington
I’m planning to do this rather spiffing Nut Roast Wellington as the centrepiece of our Christmas lunch this year. Having never made one before the last thing I wanted was to put the whole thing together on Christmas morning only to find it didn’t work…! Nightmare! So, a couple of weeks ago, before I went down with the dreaded lurgy, I decided to have a trial run.
The thing I was most worried about was the pastry splitting, allowing all the filling to fall out, but I needn’t have worried; it all held together nicely and went surprisingly well.
Although the instructions look lengthy, it’s actually not as fiddly to do as I expected; it sounds much worse than it is. Now I’ve done it I feel quite confident about doing it again; in fact, I’m looking forward to it.
I shall be serving this on Christmas Day with roast potatoes, maple roast roots (parsnips, carrots and celeriac), sprouts with chestnuts and proper homemade gravy. Lovely!
Incidentally, if you're looking for something to serve with the leftover Wellington, can I suggest this Root Vegetable Gratin? It tastes brilliant and it cleverly uses up any leftover roasted roots from Christmas Day.
Nut Roast mixture:
1 onion, finely chopped
1 tbsp olive oil
200g whole mixed nuts
175g fresh wholemeal breadcrumbs
75g mature cheddar, grated
200ml stock
1 egg, beaten
½ tsp Marmite
1 tsp dried oregano
25g dried cranberries
Mushroom Duxelles:
250g chestnut mushrooms, very finely chopped
1 shallot, finely chopped
few fresh thyme leaves
25g butter
500g pack of ready-rolled puff pastry
1 egg, beaten
For the Mushroom Duxelles:
Sweat the mushrooms, thyme and chopped shallot in the butter over a very low heat until all the liquid has evaporated and you are left with an almost dry mushroom pate. Set aside to cool.
For the Nut Roast:
Sauté the chopped onion in the olive oil until golden and set aside to cool.
Grind the nuts in a food processor until reasonably fine, but still with some texture. Place the ground nuts in a large bowl; add the breadcrumbs, grated cheddar, oregano and cooled onion; mix well. (At this point you can put it in the fridge and finish it off next day, if you want.) Whisk the stock together with the beaten egg and Marmite; add this to the bowl and mix with a fork until the mixture starts to hold together. Remove about 1/3 of the mixture to a small bowl and stir in the dried cranberries.
Assembling the Wellington :
Unroll the pastry onto a lightly floured surface and roll lightly with a rolling pin to make it a bit larger.
Put the nut roast mixture with cranberries in the centre of the pastry and form into a rough rectangle about 8cm x 12cm. Spread the mushrooms duxelles over the top, then cover with the remaining nut roast mixture.
Now the fun begins! Fold the edges of the pastry over like a parcel, to completely enclose the nut roast, using the beaten egg to seal all the edges. You may need to cut off a bit of the pastry to avoid the seams being too thick. (I cut some little Christmas trees from the trimmings and stuck them on top but, quite frankly, that was a waste of time!)
Line a shallow baking tray with non-stick baking paper and, very carefully, turn the Wellington over and lay it, seam-side down, on the baking tray. Brush all over with the rest of the beaten egg and bake at 210C for 20 minutes then turn the temperature down to 180C and cook for a further 35-40 minutes until deep golden brown and cooked through. (I have a fan oven so you may need to adjust timings or temperatures a bit).
It looked a bit like a rather gorgeous loaf of bread when it came out of the oven! Allow to cool for about 20 minutes before cutting in thick slices to serve.
Serves 4 with lots of lovely leftovers to pick at later! It's also fabulous cold with chutney and salads on Boxing Day.
Quick update: Last year I decided to go down the route of making a plait. To be honest, it was much easier and quicker than the original version and it was just as yummy.
All I did was lay the ready-rolled puff pastry on a floured baking sheet, put the same filling as above length-ways down the centre third, then cut the pastry either side into an even number of strips slightly on the diagonal; brush the strips with beaten egg then fold over the filling, making sure you tuck the ends in neatly. Brush the whole thing with more beaten egg and bake as above.
And there you go - you have yourself a gorgeous golden Christmas Nut Roast Plait!
Quick update: Last year I decided to go down the route of making a plait. To be honest, it was much easier and quicker than the original version and it was just as yummy.
All I did was lay the ready-rolled puff pastry on a floured baking sheet, put the same filling as above length-ways down the centre third, then cut the pastry either side into an even number of strips slightly on the diagonal; brush the strips with beaten egg then fold over the filling, making sure you tuck the ends in neatly. Brush the whole thing with more beaten egg and bake as above.
And there you go - you have yourself a gorgeous golden Christmas Nut Roast Plait!
Thursday, 20 October 2011
Autumn Vegetable Cobbler
The weather has been really chilly this last few days; all very autumnal with a promise of winter in the air.
The raised beds in the garden, which were groaning under the weight of assorted vegetables during the summer, are now almost empty and looking a bit sorry for themselves. We pulled up the last of the carrots at the weekend and I also pulled a couple of leeks to see how they were getting on; I’ll leave the rest of them there to use up throughout the winter. I can feel plenty of leek and potato soup coming on…
I’ve been looking for ways to expand my new-found scone know-how (I’m so chuffed with myself…you’ve no idea!) and was thrilled to be able to cook a cobbler for the first time. Along with the handful of carrots and leeks I’d collected from the garden there were sundry other veg in the fridge so I used a few mushrooms, a couple of sticks of celery and a solitary sweet potato to make a rather nifty autumnal dinner that will definitely be making further appearances in future.
**If you’re luckier than me the vegetable casserole base will all stay in the dish rather than bubbling up, running down the side of the dish and burning on the bottom of the blasted oven!
1 medium sweet potato, peeled and cubed
2 medium carrots, peeled and chopped
2 leeks, well washed and cut into chunks
2 sticks of celery, chopped
150g chestnut mushrooms, halved
½ tsp dried thyme
1tbsp olive oil
1tbsp plain flour
350ml stock
2 tsp Worcester sauce
½ tsp Marmite
1 dsp tomato puree
100g self-raising flour
25g butter
½ tsp baking powder
75g grated mature cheddar
½ tsp dried thyme
75ml buttermilk (you may not need all of it)
Heat the oil in a large pan and sauté the veg for 10 minutes; stir in the flour and gradually add the stock followed by the Worcester sauce, Marmite and tomato puree. Bring to the boil, pop a lid on and simmer for 15-20 minutes.
Meanwhile, for the cobbler topping, mix the flour and baking powder together then rub in the butter until the mixture resembles breadcrumbs. Stir in the thyme and ⅔ of the cheese then mix in enough of the buttermilk to form a very soft dough. Pat the dough out on a floured surface to form a small circle about 2.5cm thick. Cut out 4 small scones with a 5.5cm plain cutter. Heat the oven to 200C.
When the vegetable mixture is cooked transfer it to a small ovenproof dish and put the four scones on top; sprinkle the remaining cheese on top and bake for 12-15 minutes until golden and risen.
Serves 2
Tuesday, 4 October 2011
Cheese Scones
Well, I’ve finally done it…I’ve made some scones that are actually edible! I am so chuffed with myself! They probably wouldn't win a prize at a village fete but they are the best ones I have ever made.
Scones are one of those things that other people always seem to whip up effortlessly at the drop of a hat. Other people….but, sadly, not me! My scones have always been flat, or dry, or as hard as a rock….or sometimes all three! I’ve not attempted making them for some years now but I was inspired to have one more try after seeing a recipe on the now defunct BBC Food Q & A; big thank you to forum member Saffiewalks. It looked very simple and easy so, with some trepidation, I thought I’d give it a go.
Astonishingly, the recipe worked! They weren't flat, hard and dry, they were light, fluffy and lovely. Well, you could have knocked me down with a cricket bat!
The husband said if he’d been served scones like this in a National Trust tearoom he’d have been a very happy bunny; high praise indeed, given that the best cheese scones I have ever had were at Bateman's, a favourite place of ours when we lived nearby on the Kent/ E. Sussex border.
(Word of advice if you happen to be going to Bateman's; arrive at opening time and head straight for the stables tearoom while their freshly baked scones are still warm; I promise you won't be disappointed!)
Now I’ve managed to make scones once, perhaps I’ll make a fruity version next time, or plain ones to have with some homemade jam. I can't wait to experiment!
8oz self-raising flour
1 tsp baking powder
2oz butter
5 oz grated mature cheddar
125ml buttermilk (approx)
1 tbsp chopped chives
Rub butter into flour and baking powder then stir in the chives and 4 oz of the cheese; stir in buttermilk gradually until you have a medium wet dough.
You can leave out the chives and sift in 1/2 teaspoon dried mustard powder with the flour. The main thing is to handle the dough as little as possible and get the scones into the oven as soon as you can after you have added the liquid.
Makes 6 - 8 scones.
8oz self-raising flour
1 tsp baking powder
2oz butter
5 oz grated mature cheddar
125ml buttermilk (approx)
1 tbsp chopped chives
Rub butter into flour and baking powder then stir in the chives and 4 oz of the cheese; stir in buttermilk gradually until you have a medium wet dough.
Pat the dough out on a floured board until it's about 3cm thick, cut
into rounds and put on a baking tray. Sprinkle the rest of the grated cheese on top of
the scones. Cook for 12 - 15 minutes in a hot oven – 200C fan; cool on a wire rack.
You can leave out the chives and sift in 1/2 teaspoon dried mustard powder with the flour. The main thing is to handle the dough as little as possible and get the scones into the oven as soon as you can after you have added the liquid.
Makes 6 - 8 scones.
Wednesday, 21 September 2011
Butternut Bake
This is my take on a Simon Rimmer recipe I saw online recently for a roast squash bake; it looked OK but I thought it had far too much cheese, not enough onion and nowhere near enough garlic for our taste; oh, and I also thought the recipe was poorly written, but apart from all that it was fine!
This dish is one of those where the whole is definitely greater than the sum of its parts. It doesn’t look much when it’s assembled and you’re just about to put it in the oven, but once it’s cooked all the flavours and textures come together; it smells wonderful while it’s cooking and it tastes even better.
1 small butternut squash
1 tbsp olive oil
2 red onions, peeled and cut into eighths through the root
5 cloves garlic
6 tsp Sacla Organic pesto
8 sun-dried tomato halves in oil from a jar
125g soft goats’ cheese
1egg
2tbsp crème fraiche
2tbsp grated parmesan-style cheese
Peel and chop the squash into chunks, discarding the seeds; put the chunks into a large baking tray, pour the oil over and mix the whole lot together with your hands. Heat the oven to 200C and put the tray in for 20 mins. Take the tray out of the oven, add the red onion wedges and the unpeeled garlic cloves, then put it back in the oven for another 20 minutes until the squash is tender and the onions are cooked and lightly caramelised.
Put the cooked squash into an ovenproof dish followed by the onion and the garlic, which you need to squeeze out of its papery case. Put teaspoonfuls of the pesto over the squash and onions then lay the tomato halves over the top.
Whisk together the goats’ cheese, egg and crème fraiche and spoon it over the vegetables. Scatter the ‘parmesan’ over the top and pop it in the oven at 200C for 20 mins until golden and bubbling.
I served it with a simple tomato and onion salad (we’re knee-deep in toms at the moment; they’re ripening faster than we can eat them!)
Serves 2
Saturday, 20 August 2011
French Onion Soup
Before I get down to the serious business of soup, I thought you might like to see a picture of some of our gorgeous homegrown onions which are currently loitering in the shed and drying out nicely. It’s given the shed quite an exotic feel, I think! Considering the strange weather we’ve had this summer I think they did rather well.
This soup is one of those things that I used to make quite regularly in my pre-veggie days. The early veggie versions I made weren’t very good, though, to be honest; I think I was trying to recreate a taste instead of trying to make something which was just as good but different. I didn’t make it at all for some years, by which time I was ready to embrace the new flavours rather than remember the old. After much tweaking and fiddling this is the result.
Couple of points to note:
1. The cheese for the croutes should really be Gruyere but vegetarian Gruyere seems to be as rare as hen’s teeth so I used some good Cheddar instead.
2. You’ll have seen that I didn’t put the cheesy croute in the bowl with the soup; this is because I have a complete horror of soggy bread! Just the thought of it makes my skin crawl, so I have my croutes on the side of the plate where they stay well away from any potential sog!
1. The cheese for the croutes should really be Gruyere but vegetarian Gruyere seems to be as rare as hen’s teeth so I used some good Cheddar instead.
2. You’ll have seen that I didn’t put the cheesy croute in the bowl with the soup; this is because I have a complete horror of soggy bread! Just the thought of it makes my skin crawl, so I have my croutes on the side of the plate where they stay well away from any potential sog!
750g onions, peeled and thinly sliced
25g butter
½ tsp soft dark brown sugar
1 tsp dried thyme
2 tsp plain flour
1l stock
3 tbsp balsamic vinegar
50ml red wine
½ tsp Marmite
2 thick slices of French bread per person
as much grated cheese as you like
a sprinkle of dried thyme
Heat the butter in a large saucepan over a highish heat, when it’s foaming add the onions; turn the heat down to medium and cook the onions until very soft and golden brown, turning frequently. Mine took about 35 minutes.
Add the sugar, thyme and flour, stir well, then add the stock, balsamic and wine; stir well and bring to the boil. Turn the heat down to the merest simmer, put the lid on and leave to cook for 25 minutes then add the Marmite and cook for a further 5 minutes.
Five minutes before the soup is ready toast the bread on both sides; cover one side with grated cheese and a sprinkle of dried thyme and put under a hot grill until melted and bubbling. Serve the cheesy croutes with the soup, either alongside on floating on the soup if you prefer.
Serves 4 generously
Tuesday, 2 August 2011
Beetroot, Feta and Walnut Salad
Beetroot…I think it’s another one of those 'love it or hate it' foods. I've always loved it but until today I’ve only had it pickled from a jar or from a shrink-wrapped packet bought at the supermarket. Well, I am so excited, I’m fit to burst – I have just made a salad with our very first home-grown beetroot plus some gorgeous salty-sharp feta and toasted walnuts! (Really, I must get a life…I should not be this excited about a root vegetable!)
It was absolutely delicious and like no other beetroot I’ve ever tasted; I don’t know whether that’s because it was only dug from the garden this morning, because it was organically grown or because it was freshly cooked…probably a bit of all three but, whatever the reason, I have had a slice today of my own little beetrooty heaven!
4 medium raw beetroot
3 tomatoes, cut into largish chunks
½ a small red onion, thinly sliced
3 or 4 good handfuls washed salad leaves
200g feta, roughly crumbled
50g walnut halves
1 tsp Dijon mustard
1 tsp grainy mustard
1 tsp runny honey
juice of ½ a lemon
few grinds of black pepper
2 tbsp olive oil
Wrap the beetroots individually in foil, place directly onto the oven rack and roast at 200C for 30-40 minutes until tender. While the beetroots are cooking put the walnuts into a small baking tin and toast in the oven for 8 minutes (put the timer on, they turn to charcoal very quickly!)
When the beetroots are cooked and cool enough to handle, slip the skins off and cut into wedges through the root ends.
For the Honey Mustard Dressing - whisk the two mustards, honey, lemon juice and black pepper together in a small bowl then gradually whisk in the olive oil until the dressing thickens.
Chop or tear the salad leaves into bite-sized pieces and divide between two serving plates; top with the chopped tomatoes and red onion followed by the beetroot wedges, feta and the roughly chopped toasted walnut halves.
Drizzle over the dressing just before serving.
Serves 2
Saturday, 23 July 2011
Courgette and Feta Fritters
Another courgette recipe; you can tell they’re doing well in the garden this year! That's one of the things I love about ‘growing-your-own’ – when everything starts to come to fruition at once you have to find ways of using it. Good job we love ‘em!
If you have as many courgettes as me you can freeze them; just chop them into largish chunks and pack into a Tupperware box before freezing. They’ll collapse somewhat when they’re defrosted, so I wouldn’t attempt making these fritters with them, but they’ll be perfectly OK for either of the soups I’ve posted recently.
I like fritters, they’re great hot and fresh with some new potatoes or wedges and a salad, but if you have a couple left over I can recommend them for lunch next day in a soft flour tortilla with a dollop of sour cream and some leafage with a few olives on the side. Delish!400gm Courgettes
1 heaped tbsp plain flour
2 eggs, beaten
1tbsp finely chopped fresh herbs (thyme and chives are nice)
Grated zest of one lemon
1 clove garlic, finely chopped
1 shallot, peeled and finely chopped
100gms feta, crumbled into small pieces
2tbsps olive oil for frying
Grate the courgettes, salt lightly and leave to drain in a colander for 15 min. Meanwhile put the flour, eggs, shallot, herbs, garlic and lemon zest in a bowl and mix. Place the salted courgettes in the middle of a clean tea-towel then wring out the tea-towel** over the sink until the courgettes are almost dry. Add them to the bowl with the feta and mix well.
1 heaped tbsp plain flour
2 eggs, beaten
1tbsp finely chopped fresh herbs (thyme and chives are nice)
Grated zest of one lemon
1 clove garlic, finely chopped
1 shallot, peeled and finely chopped
100gms feta, crumbled into small pieces
2tbsps olive oil for frying
Grate the courgettes, salt lightly and leave to drain in a colander for 15 min. Meanwhile put the flour, eggs, shallot, herbs, garlic and lemon zest in a bowl and mix. Place the salted courgettes in the middle of a clean tea-towel then wring out the tea-towel** over the sink until the courgettes are almost dry. Add them to the bowl with the feta and mix well.
Heat the oil in a large frying pan and add a tablespoon of mixture for each fritter, flatten it out a bit and cook until the underside is golden, then turn and cook the other side. Put on a paper-towel lined plate while you cook the rest of the mixture.
Serve with new potatoes and a salad.
**Your tea-towel will look a bit wrecked, but it’ll be fine after a hot wash!
Subscribe to:
Posts (Atom)